
Knowing how to take measurements for a dog brace is essential for the brace to work properly from day one. We know that taking measurements for a brace for either dog or cat can generate insecurity.
“What if I’m wrong?”
“What if the measurement is not correct?”
“What if I don’t know exactly where to measure from?”
If you’re here, you probably want to get it right the first time. And that’s already a big step.
At Mihapi we have developed our own technical sizing, with which we cover 88% of the usual cases (don’t know if this is your case? we explain it here). In order for the splint to work correctly and for you to be right with our sizing, it is necessary that these measurements are as accurate as possible.
This guide is designed to help you do it safely. Learning how to measure for a dog brace correctly from the start avoids common mistakes and improves the final fit of the brace.
Why it is so important to know how to measure for splinting in dogs
A splint is not just an accessory.
It is a support that must:
Adjust with adequate pressure.
To stabilize the joint correctly.
Allow controlled mobility.
Avoid chafing or slipping.
Incorrect measurement can cause:
Excessive slack.
Deficient pressure.
Instability.
A good measurement avoids incidents, returns and, above all, discomfort for the dog.
How to take measurements for a dog splint step by step
Having a good understanding of how to measure for a dog brace before you start ensures that each step makes sense and that the final fit is right for you:
- Place the dog standing on a flat surface.
- Make sure the limb is in a natural position.
- Correctly identifies anatomical references.
- Measure the length indicated in each of our guides according to the ferrule.
- Measure the width in the indicated areas.
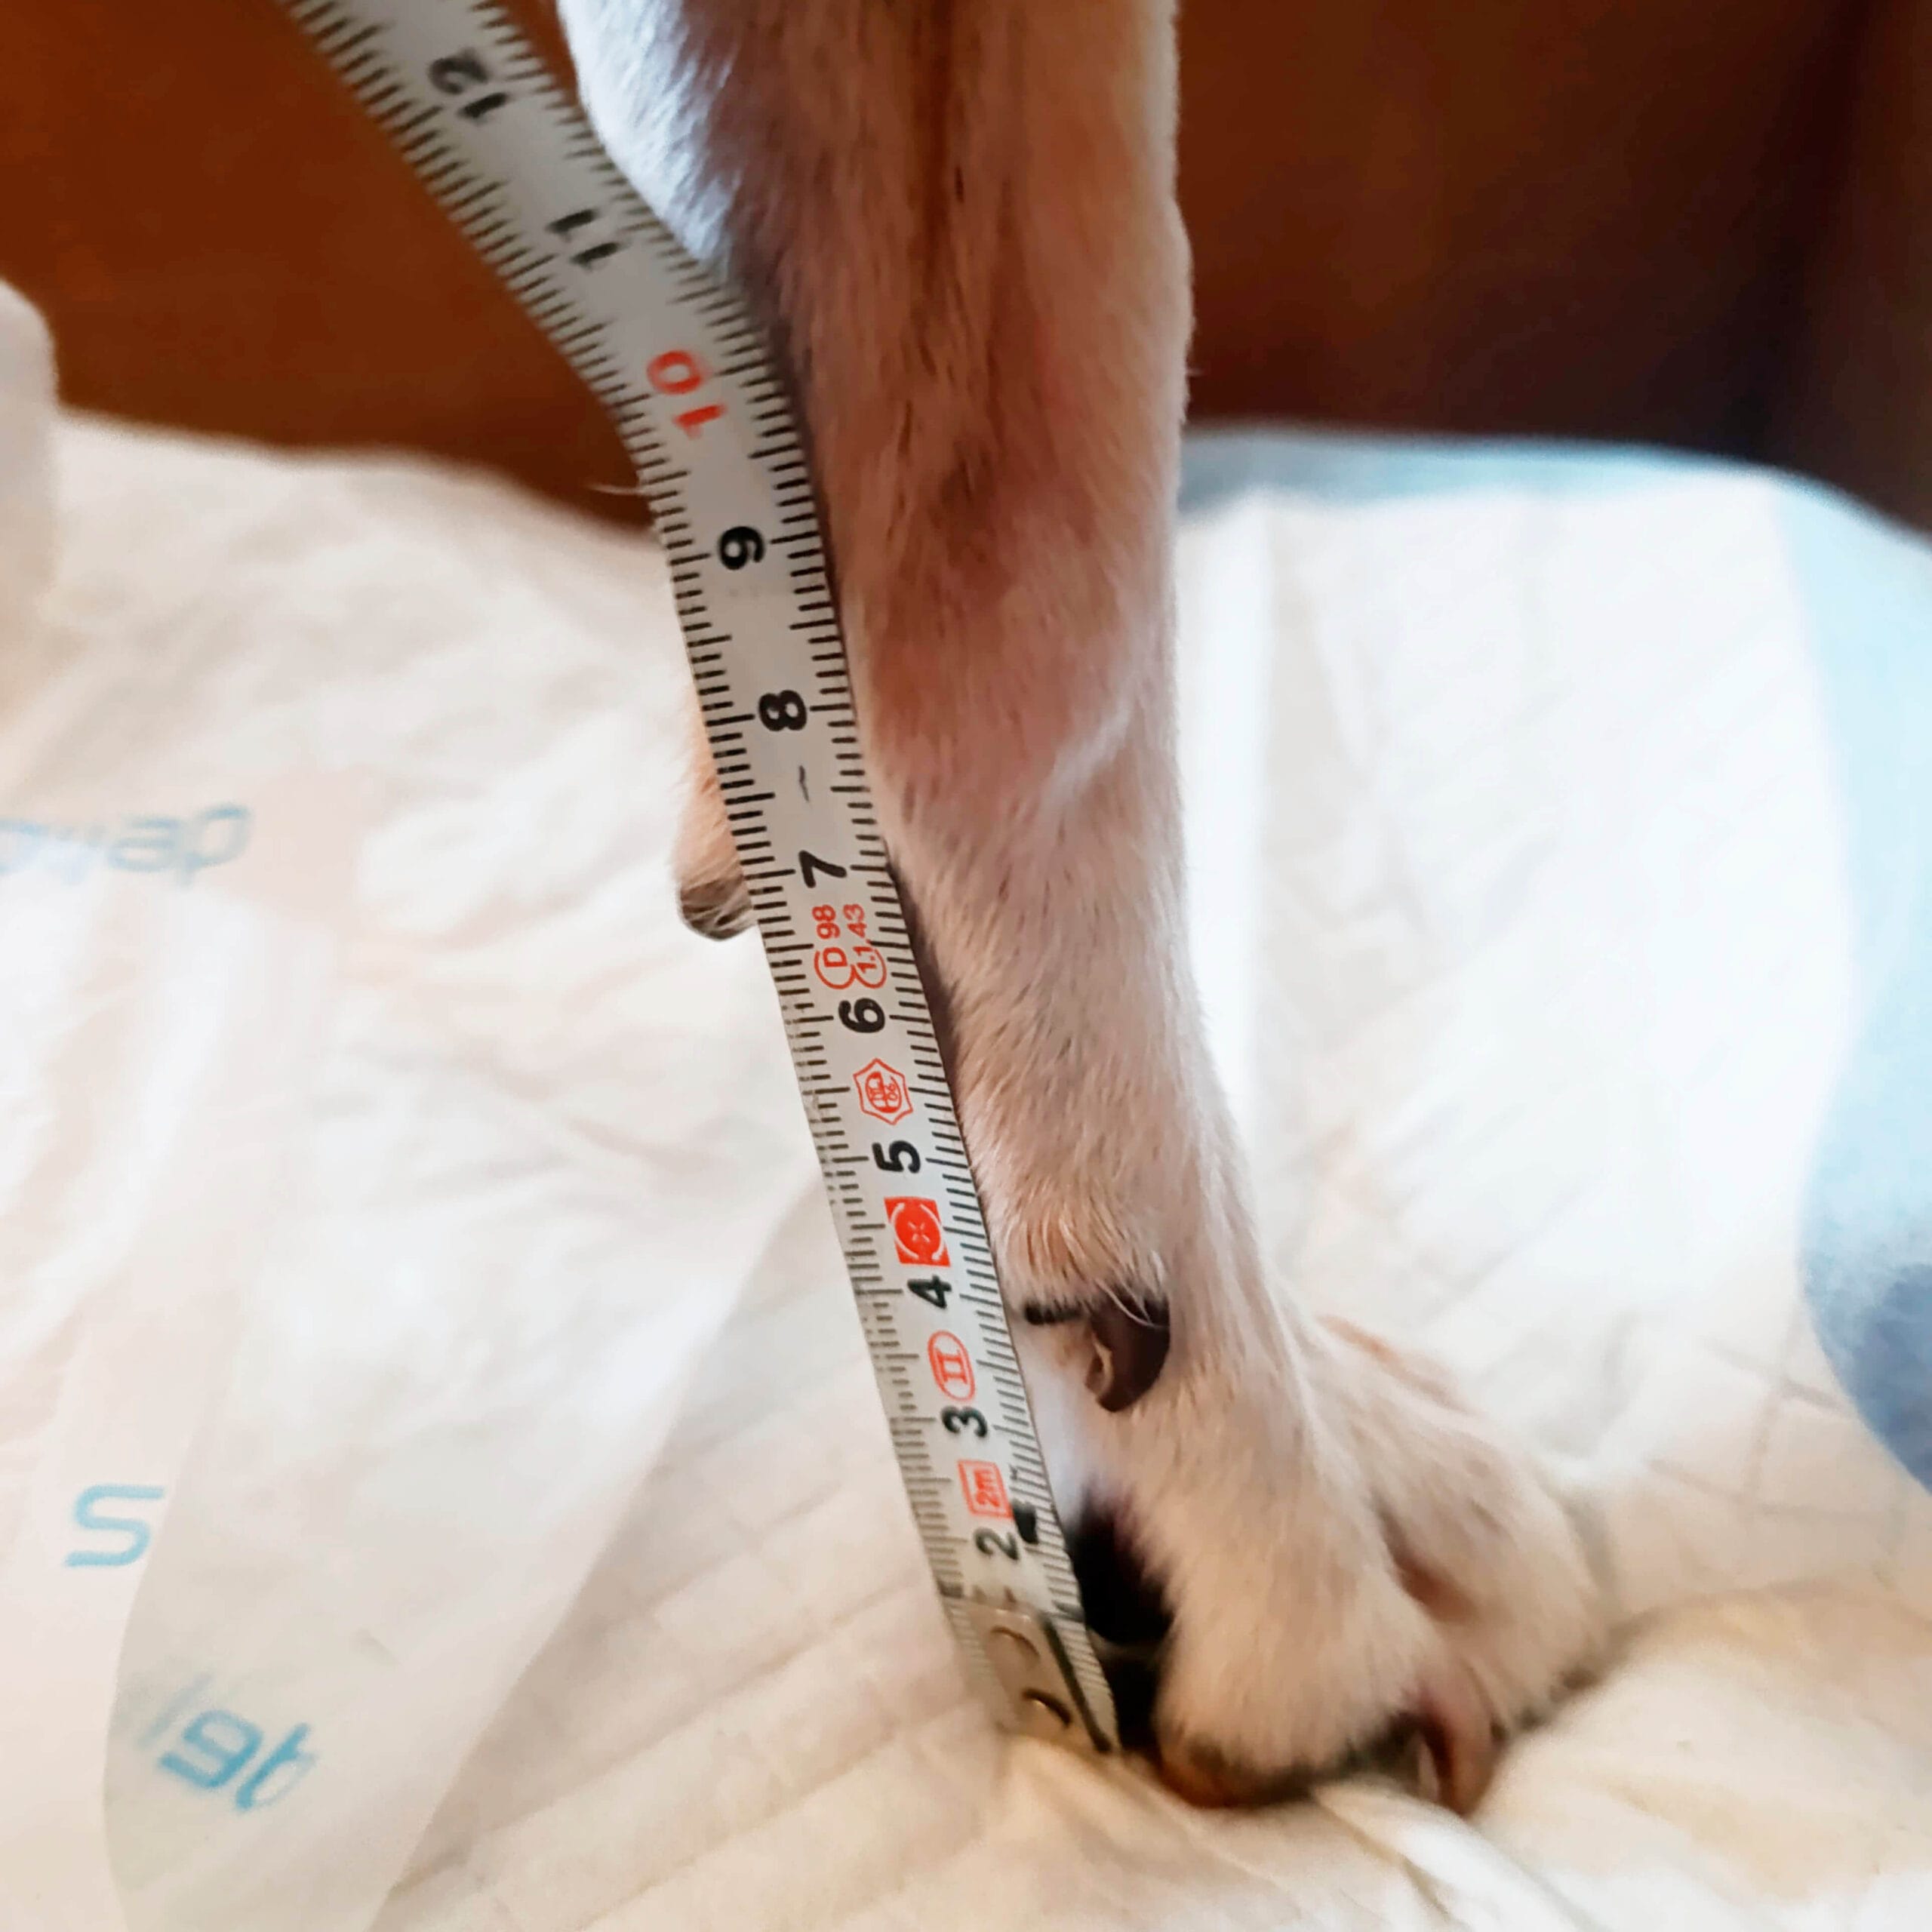
- Verify that the tape measure is firm but not pressed down.
- Repeat measurement to confirm accuracy
Summary table of measures required
| Type of splint | Necessary measurements | Most common error |
|---|---|---|
| Front splint | Stomp width + height to carpal pad | Measure with flexed leg |
| Rear splint | Width of tread + height up to the tarsus (hock) | Not supported correctly |
| Carpus splint | Carpus width + height from the carpus | Fit too loose |
| Tarsal splint | Tarsus width (hock) + height from toes to tarsus | Measurement without compressed hair |
The most common mistakes when taking measurements (and how to avoid them)
Many of these problems occur when there is a poor understanding of how to take measurements for a splint on dogs step by step or improvising during measurement.
After years of working with splints, these are the errors we see most often:
Measure over the hair without compressing slightly.
Do not place the leg in a natural support position.
Measuring from incorrect anatomical points.
Use flexible tape instead of rigid tape.
Take measurements with the dog sitting or lying down.
Take blurred photos of the measurements.
Confusing carpal joint with elbow or tarsus with knee.
Do not repeat the measurement to confirm.
If you recognize yourself in one of them, that’s fine. The important thing is to know before taking the measurements.
Good vs. bad practices
✅ Best Practices
- Standing dog, in natural support.
- Rigid tape measure.
- Tight but not over-tightening.
- Clear and well-lit photos.
- Repeat measurement 2 times.
- Follow the visual guide step by step.
Real-world examples of measures well taken
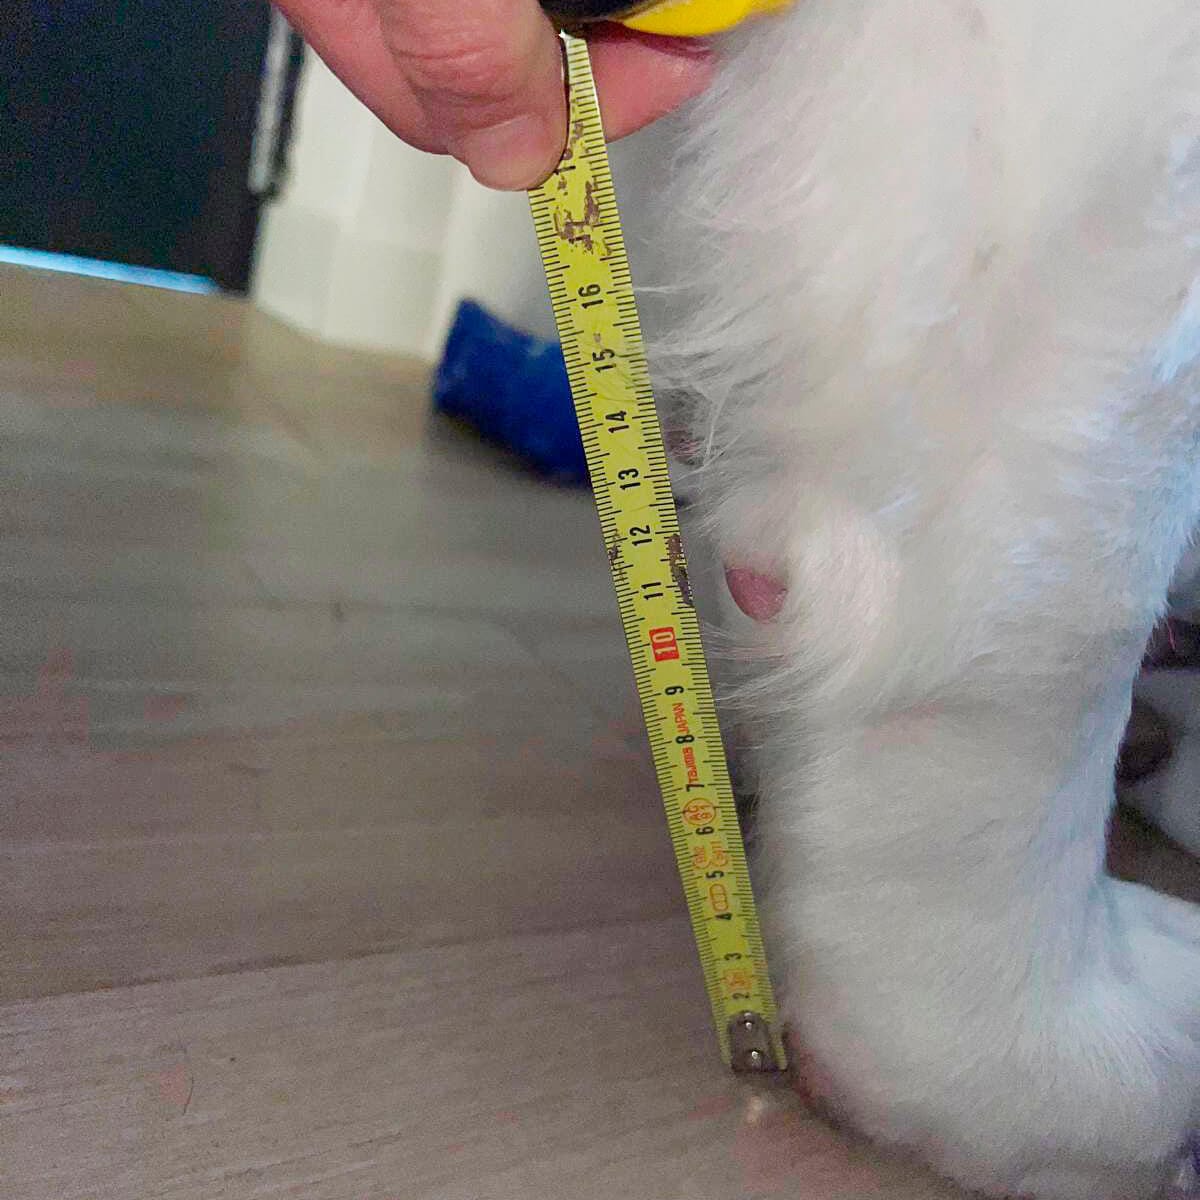
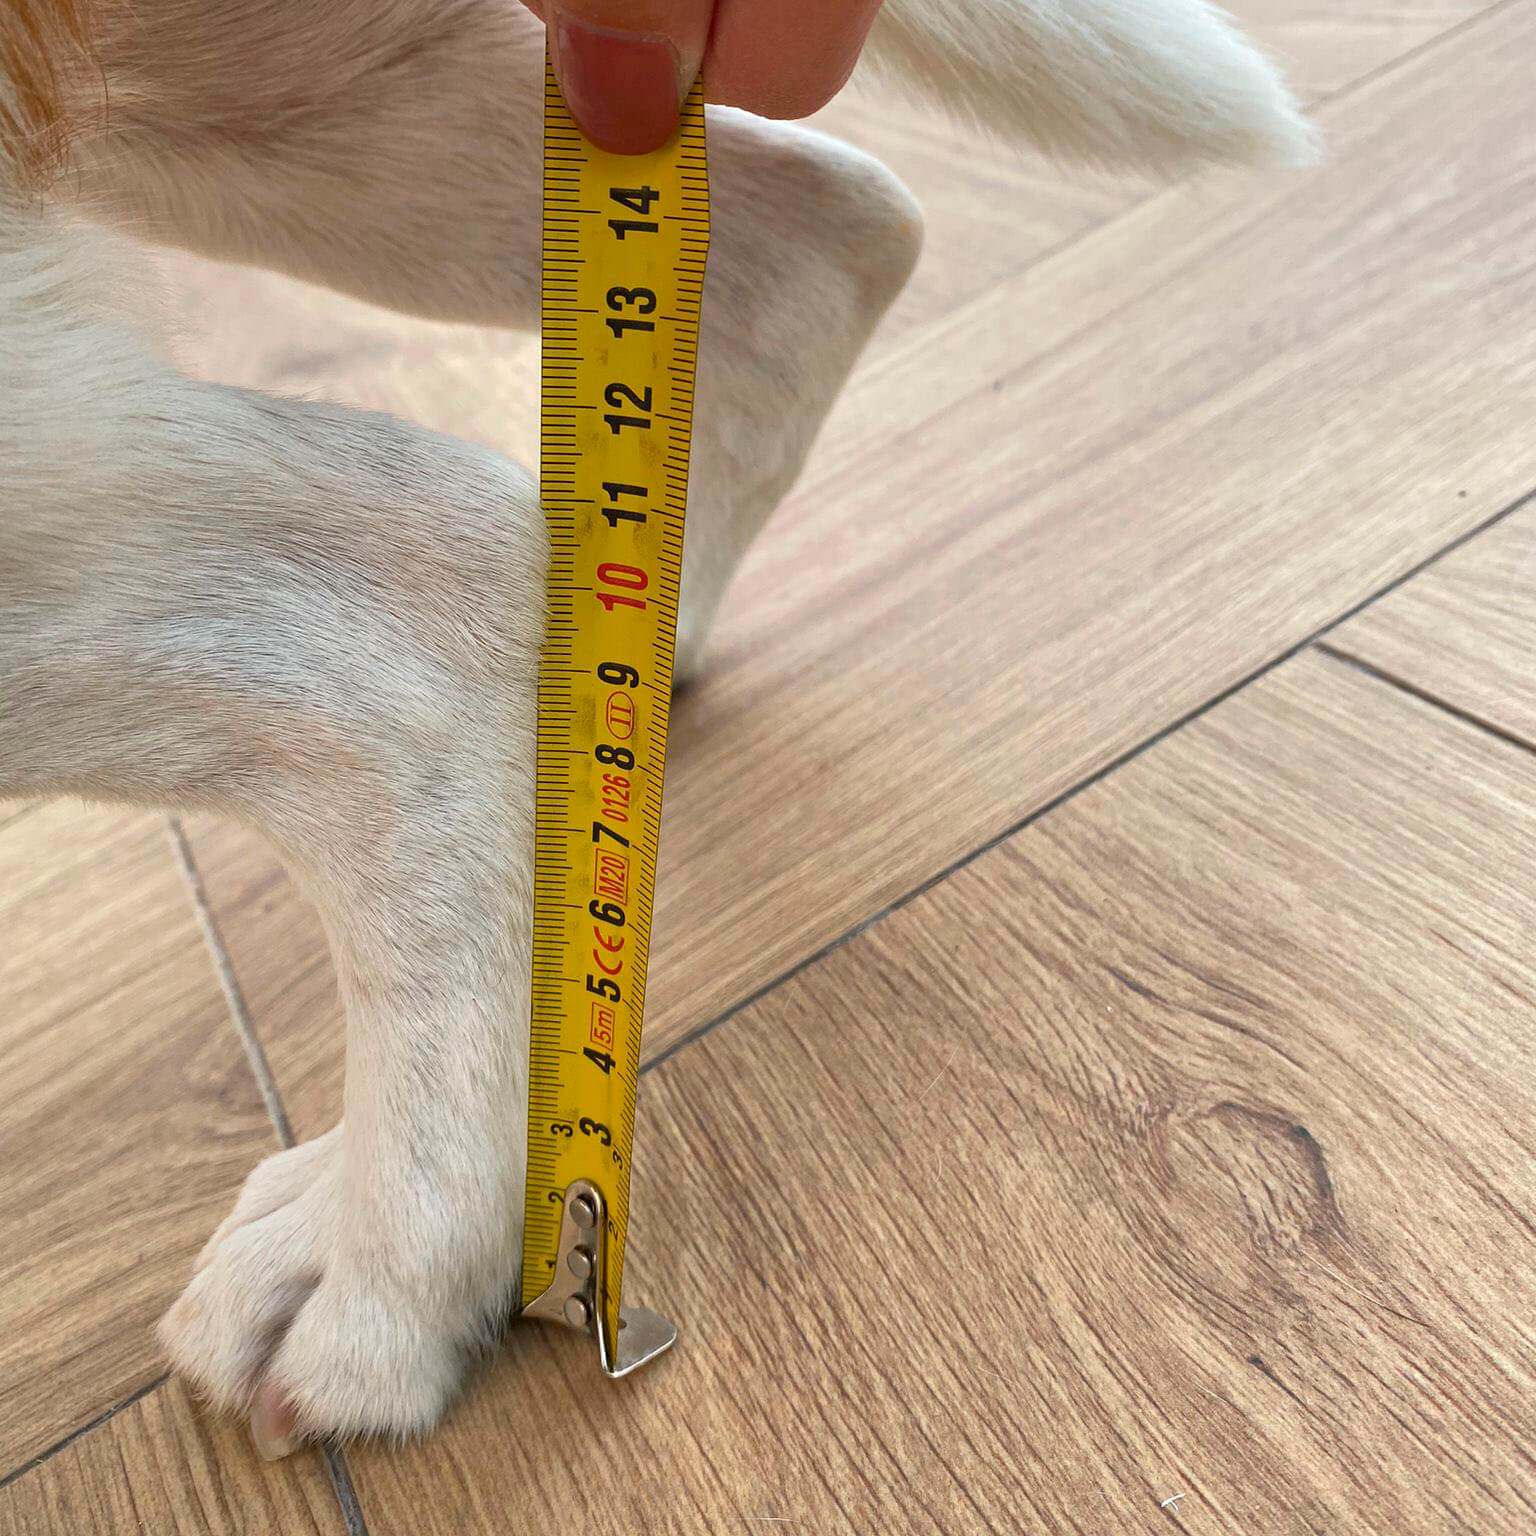
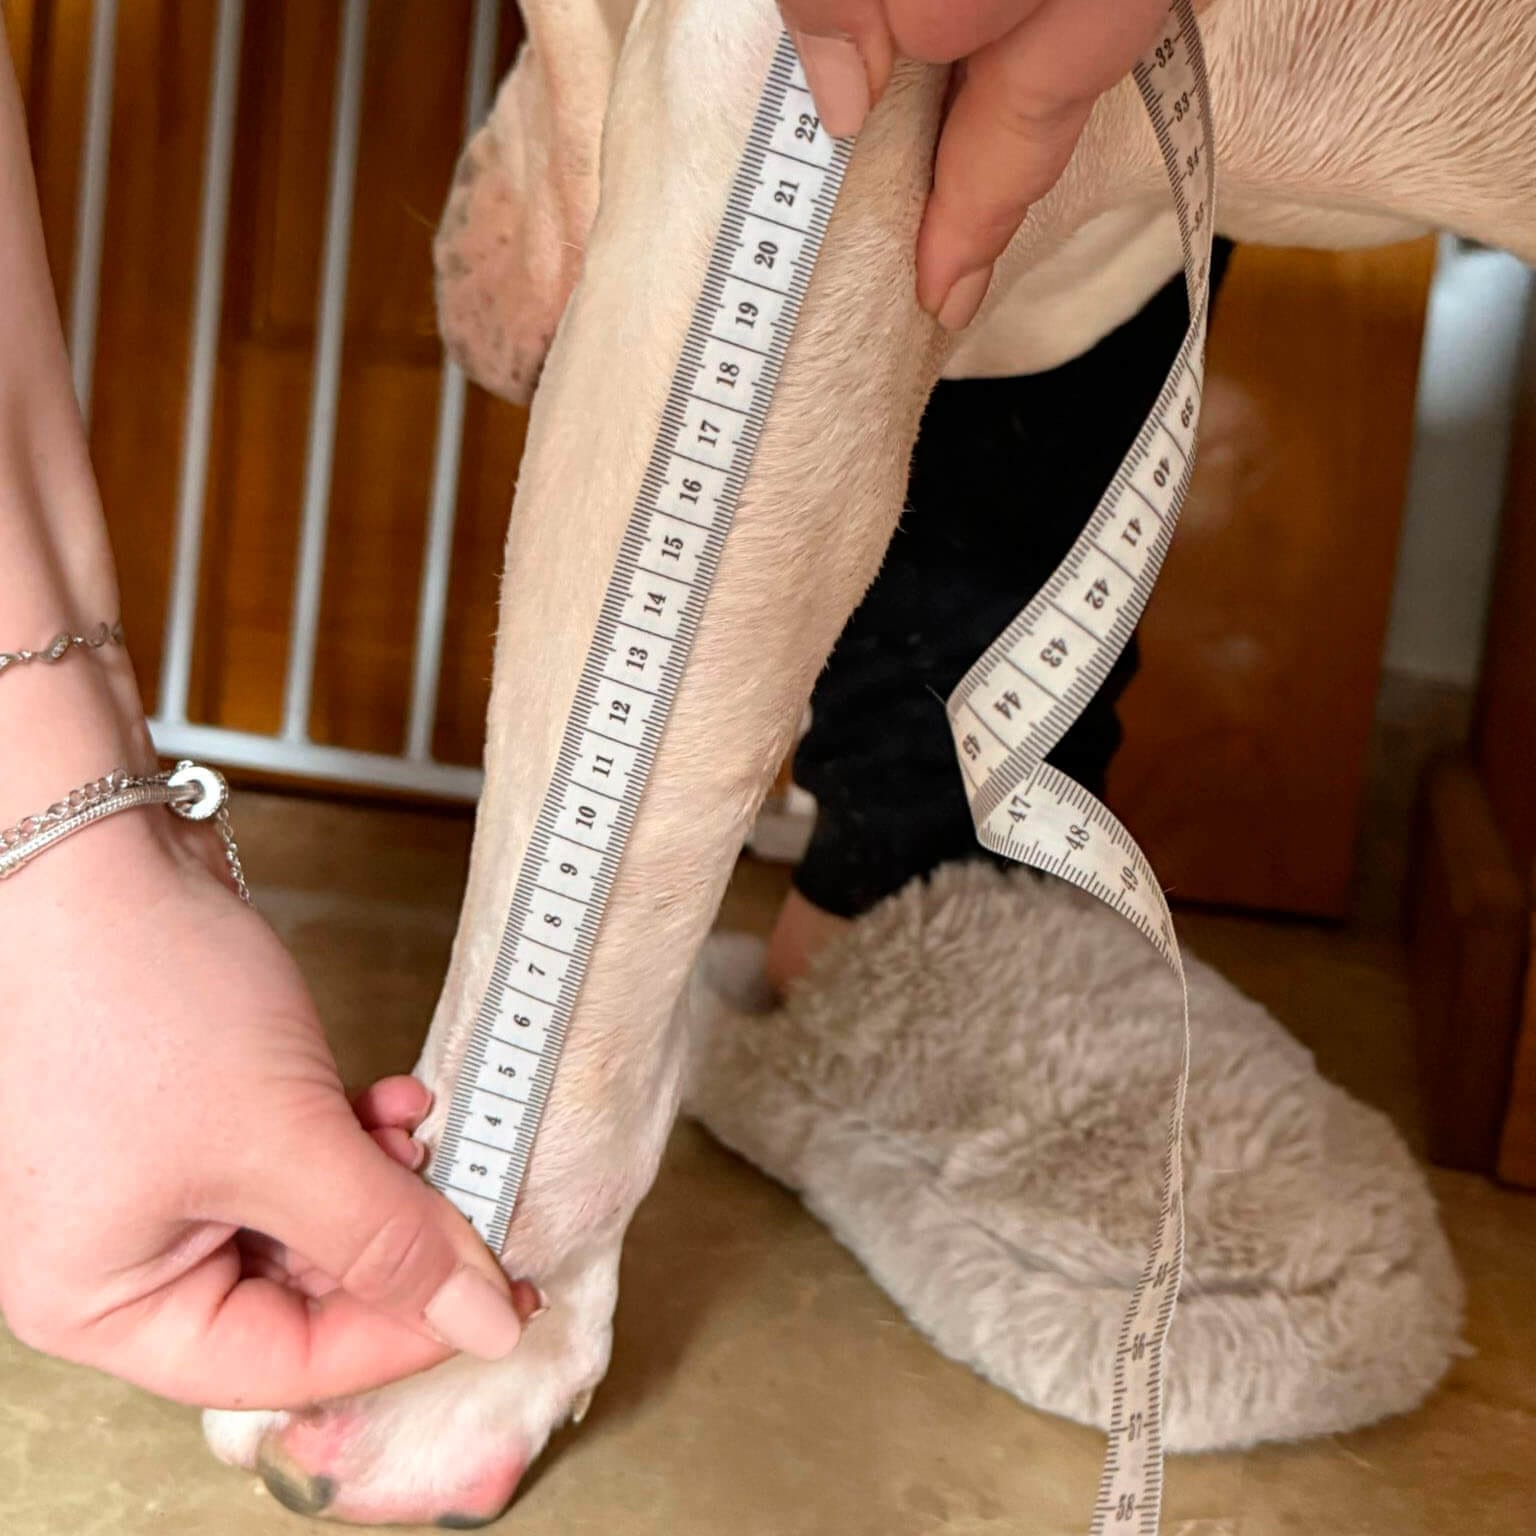
✅ The ruler follows the angle of the limb.
-

- ✅ The photo is taken from the front, and the ruler marks the correct spot.
-

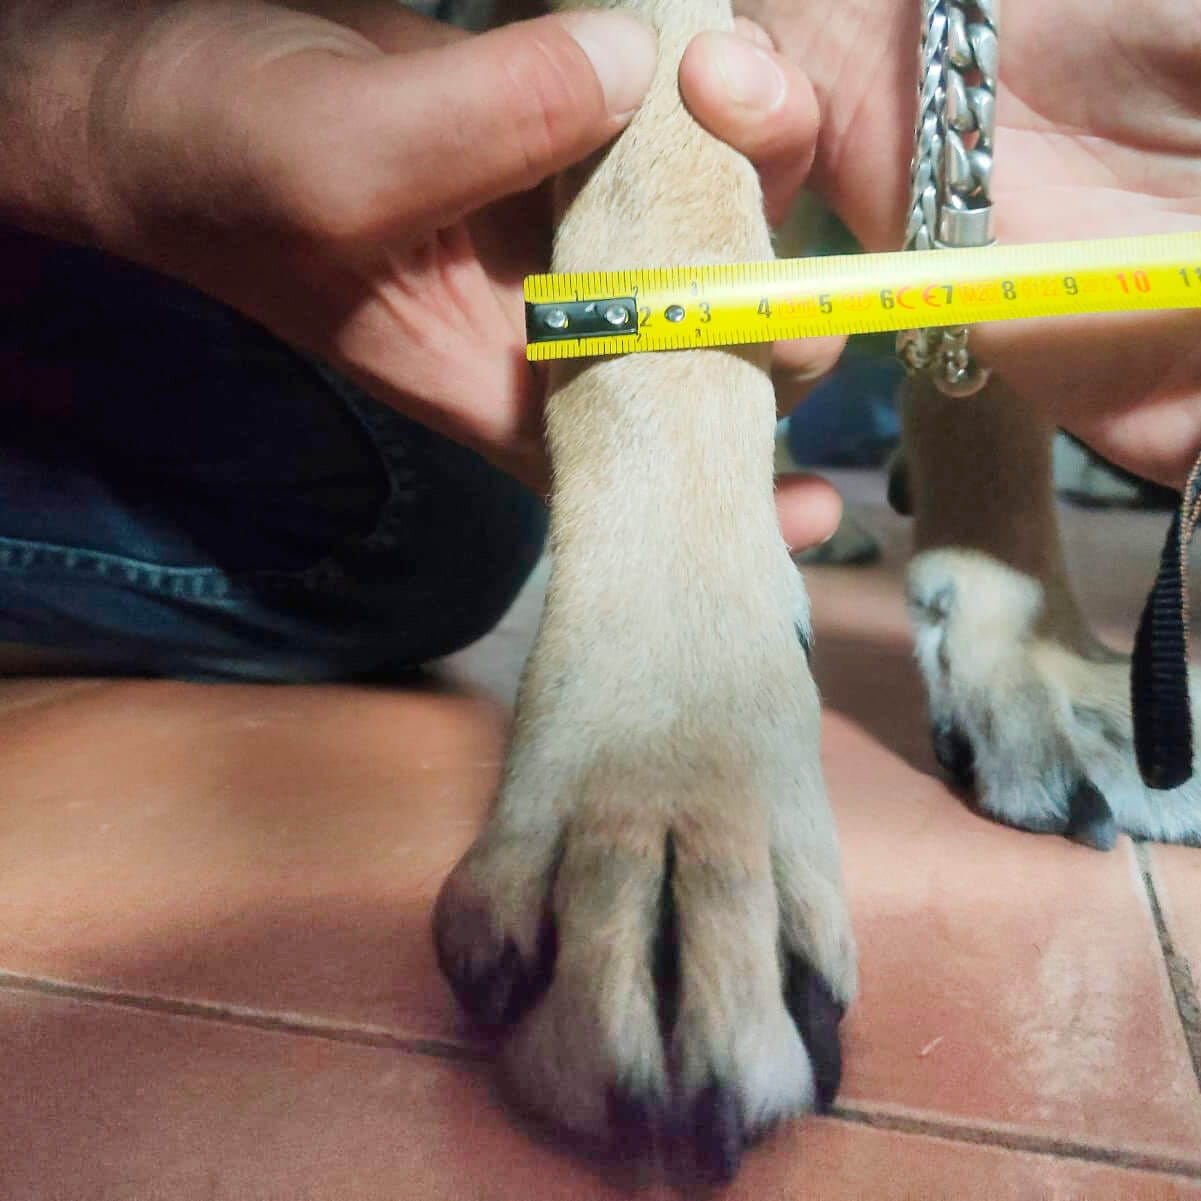
- ✅ The photo was taken from the front.
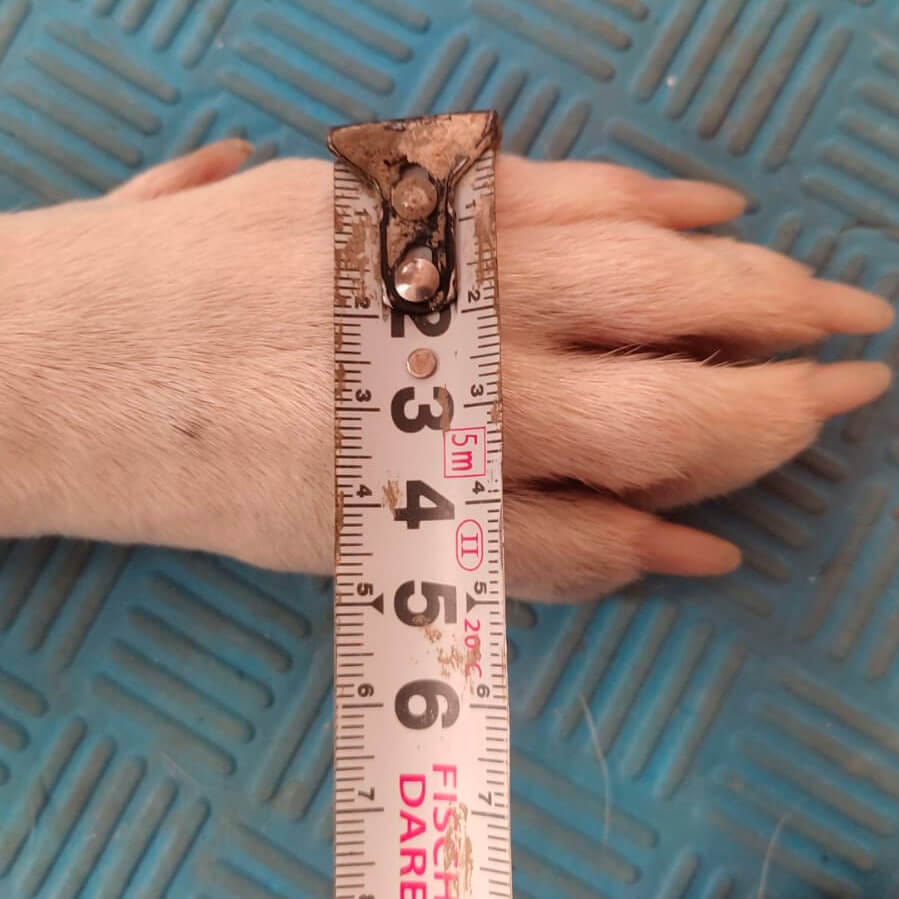
-

- ✅ You can also place the tape measure so that it is visible beneath the limb.
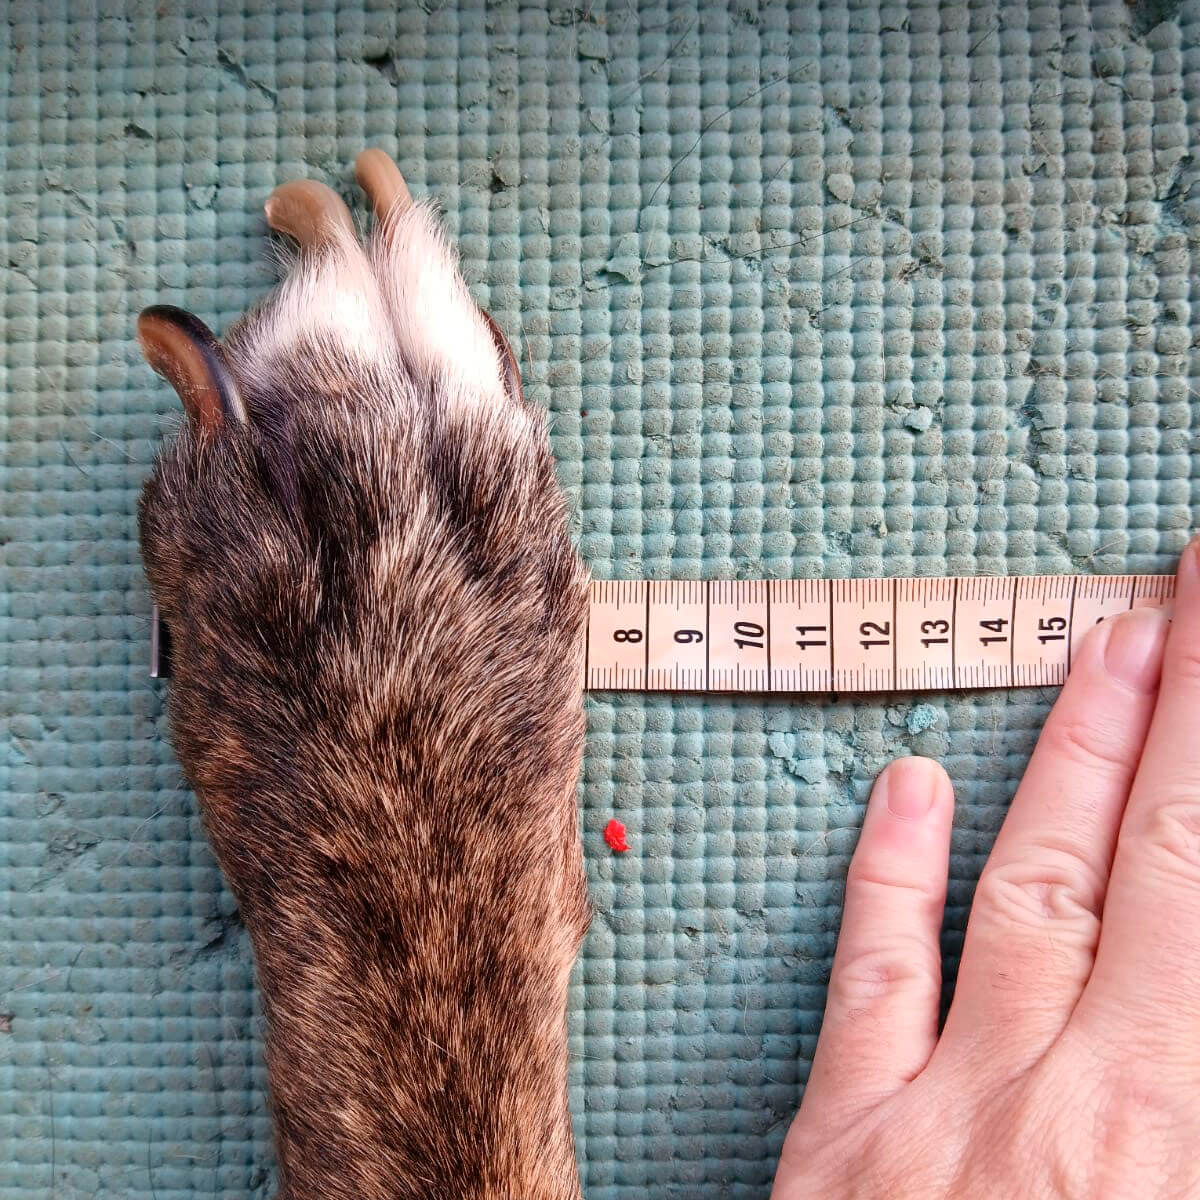
-

- ✅ The tarsus is marked by the toe.
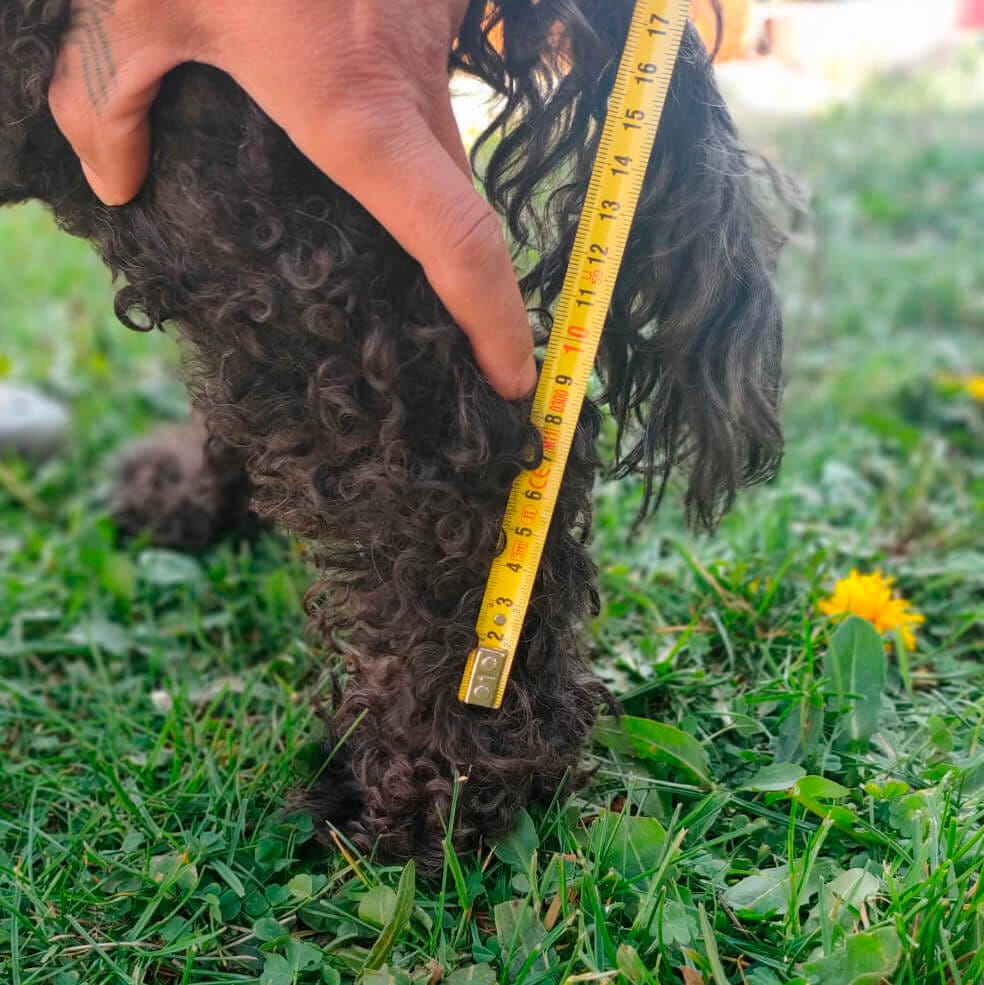
❌ Bad practices
- Dog sitting or lying down.
- Measure in front of the limb.
- Flexible measuring tape without tension.
- The leg does not rest on the ground
- Flexible or twisted tape.
- Blurred photos.
- Measure only once.
- Measure “by eye”.
Real-world examples of poorly implemented measures
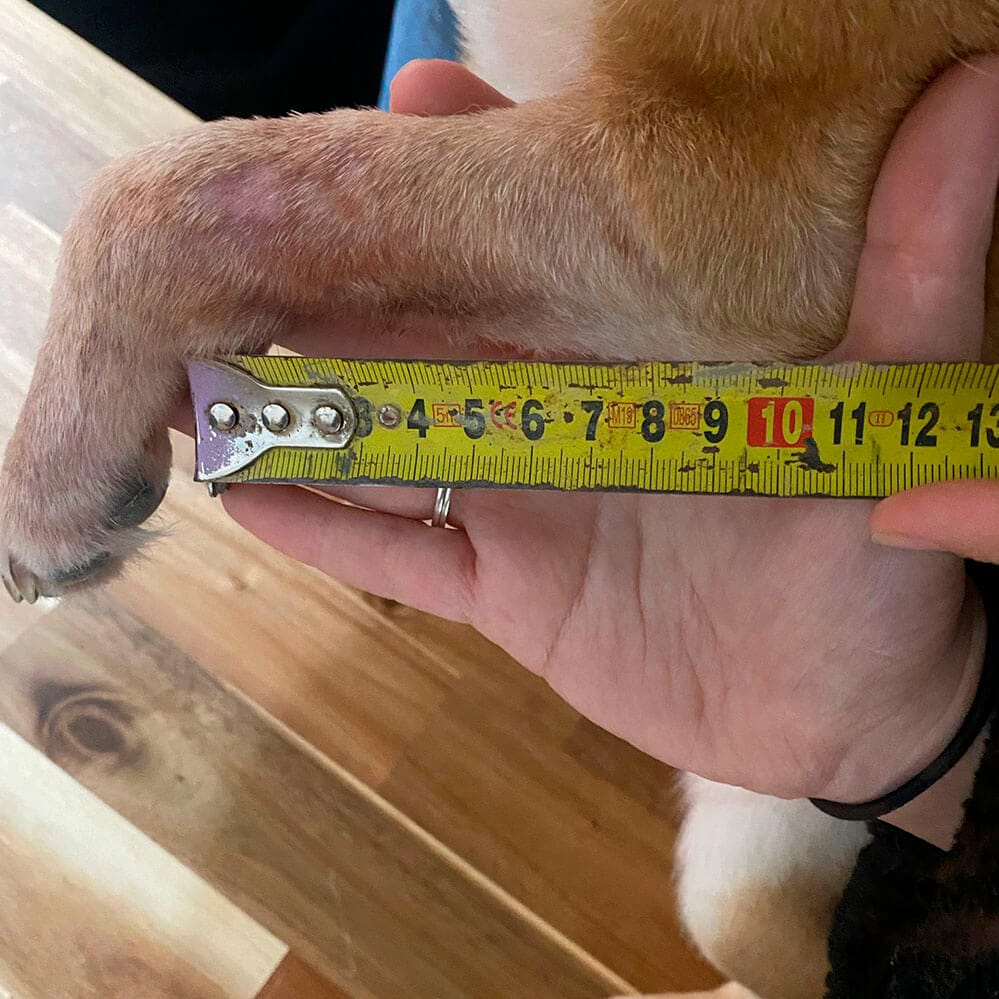
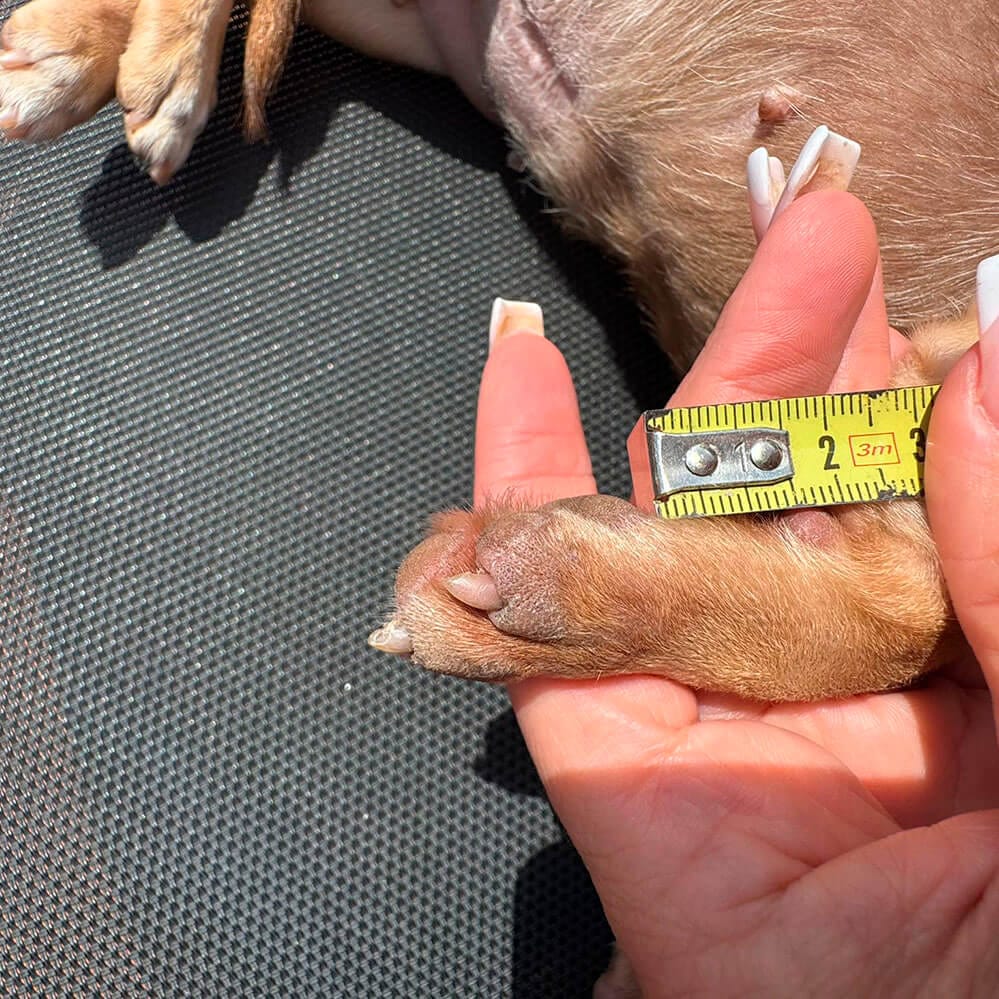
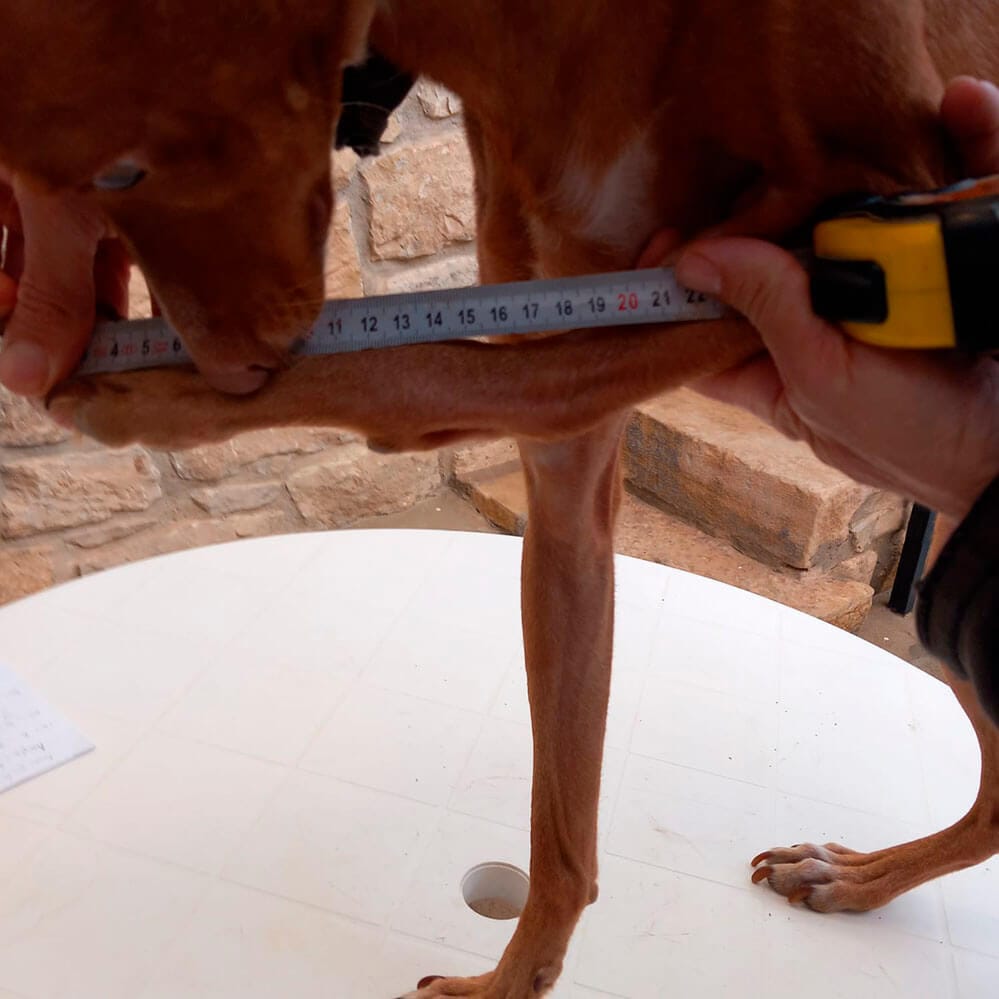
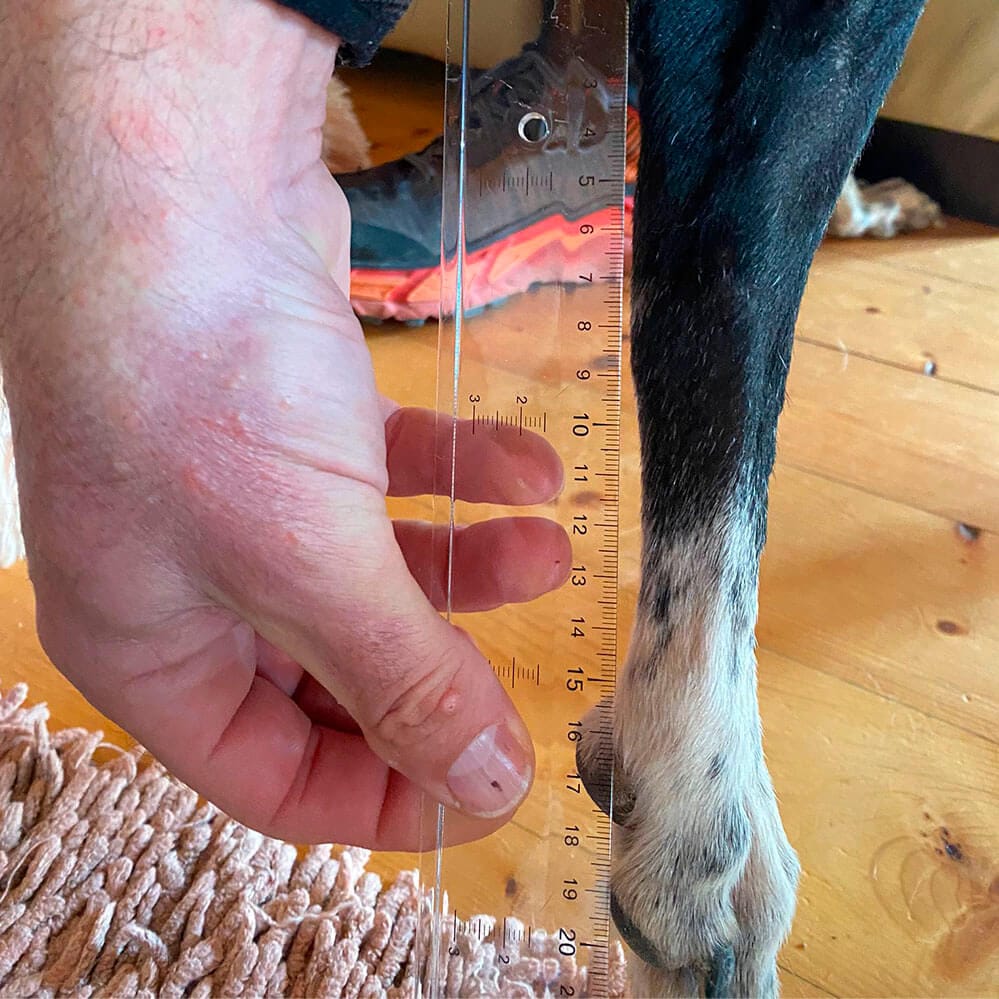
❌ The limb is not touching the ground.
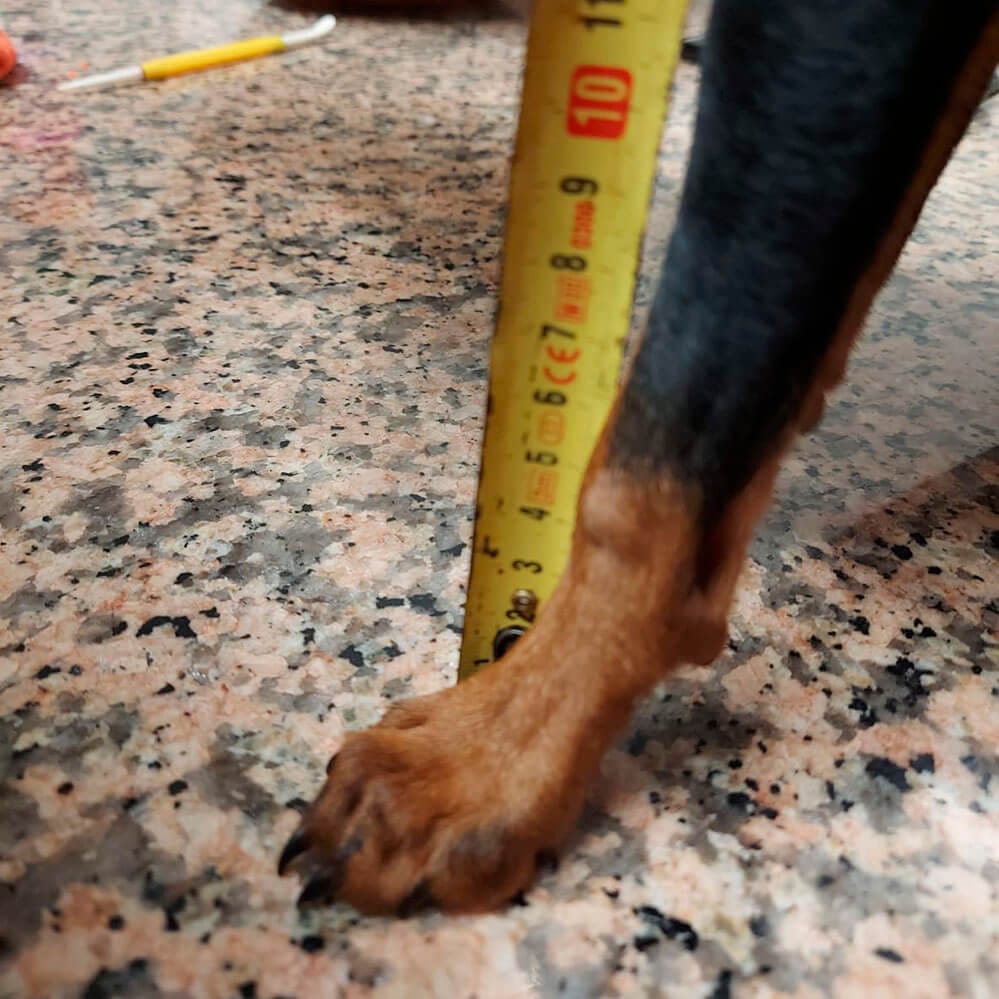
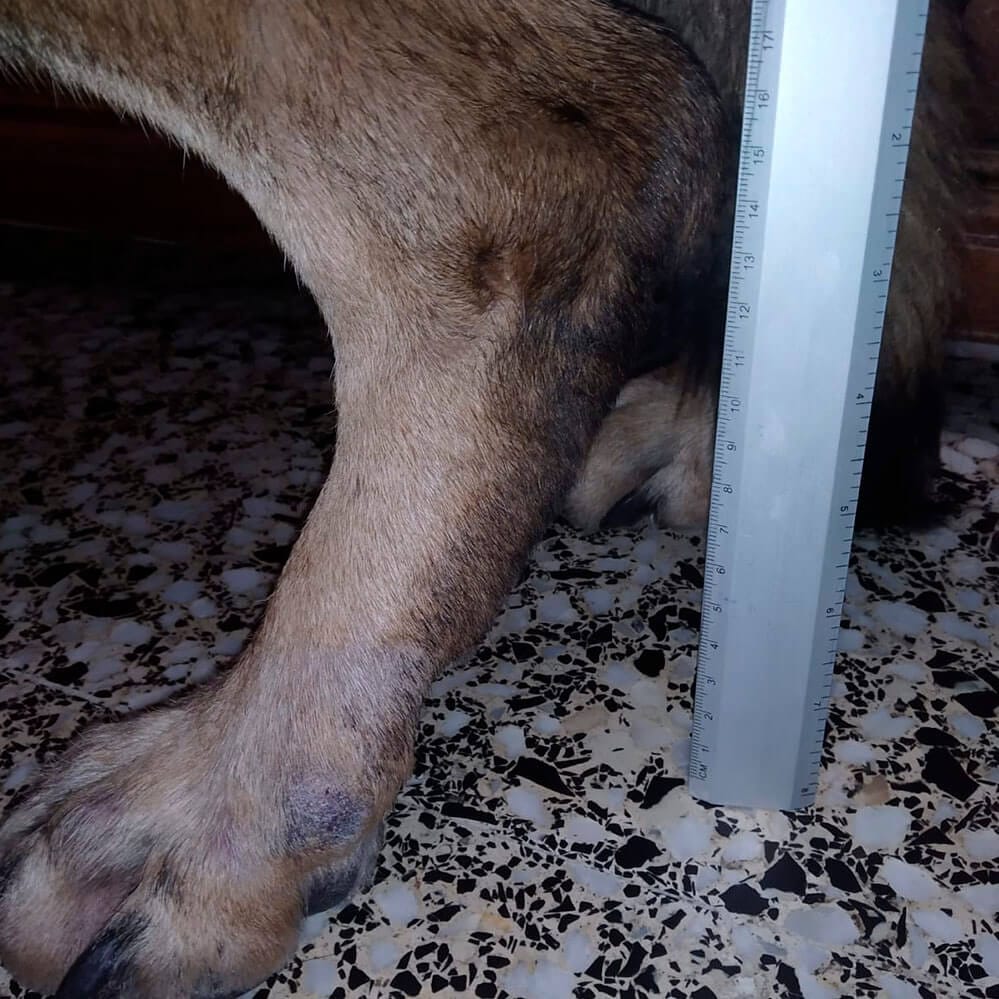
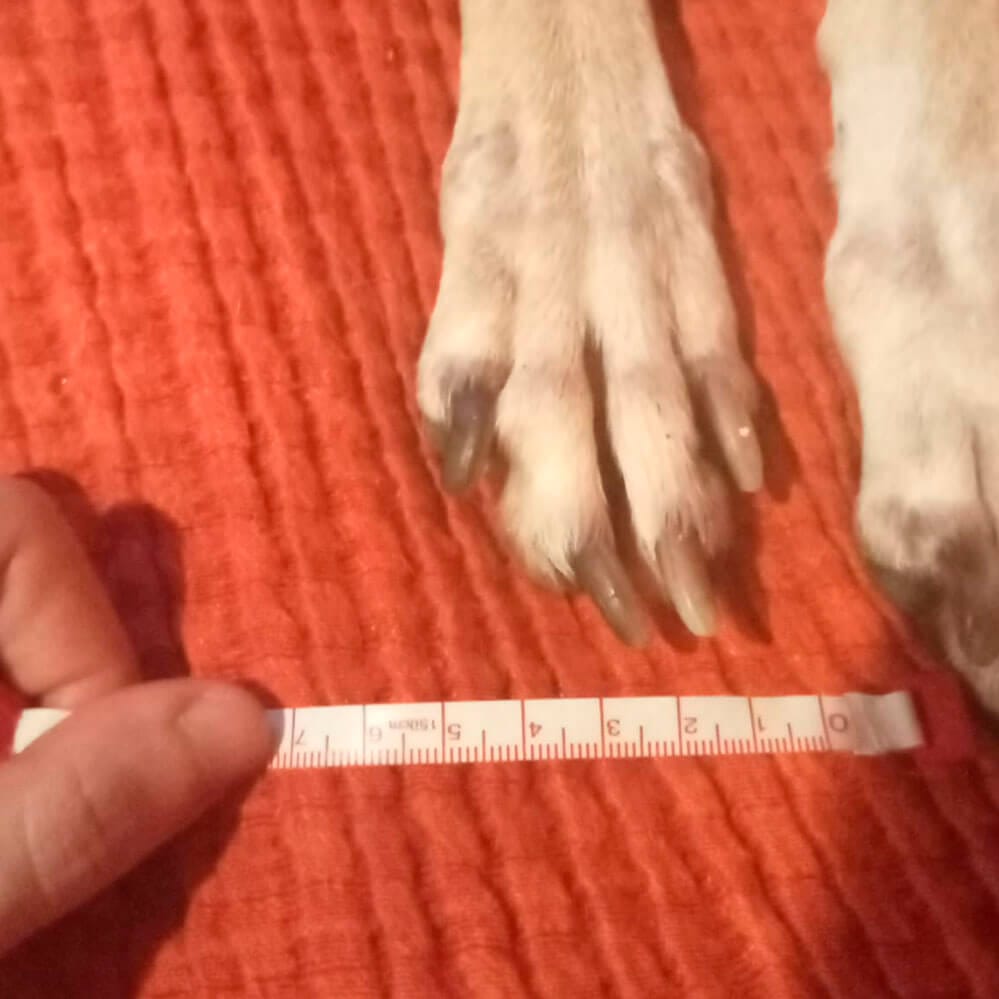
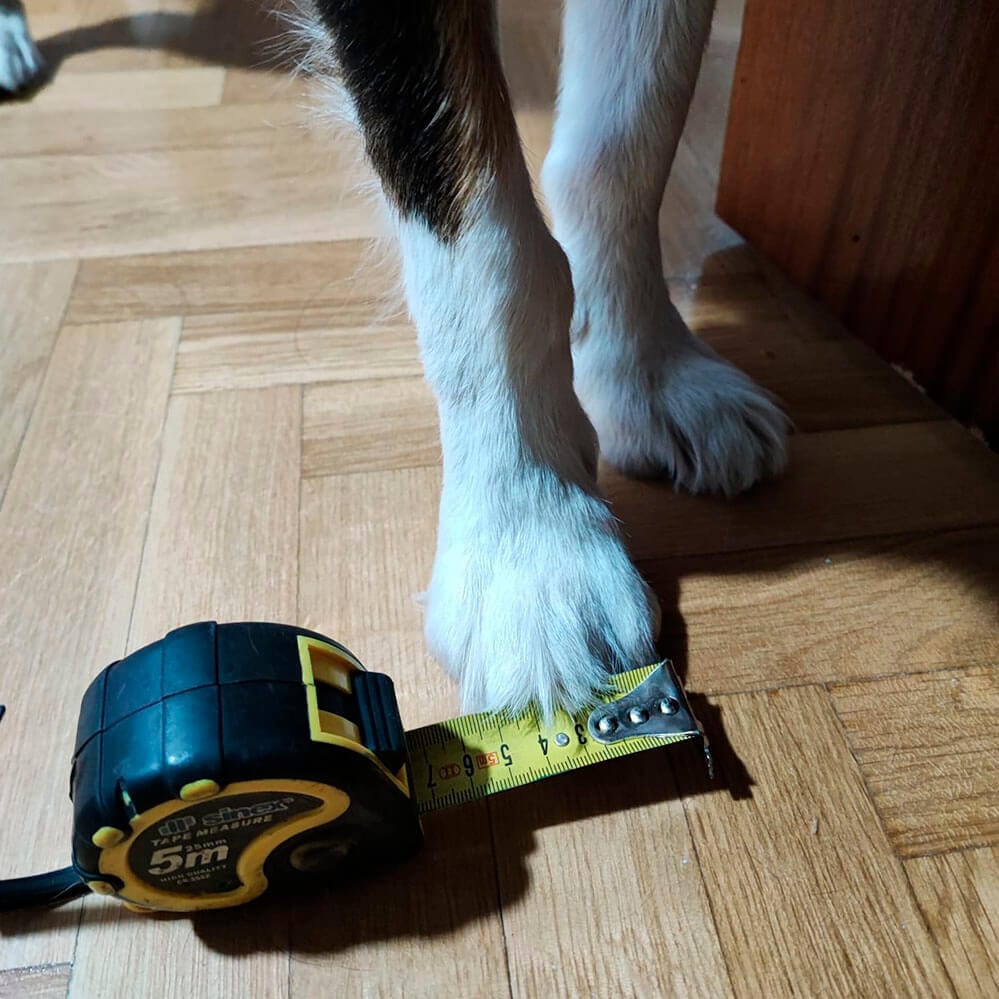
❌ Incorrect placement of the tape measure.
-

- ❌ Improper use of flexible tape.
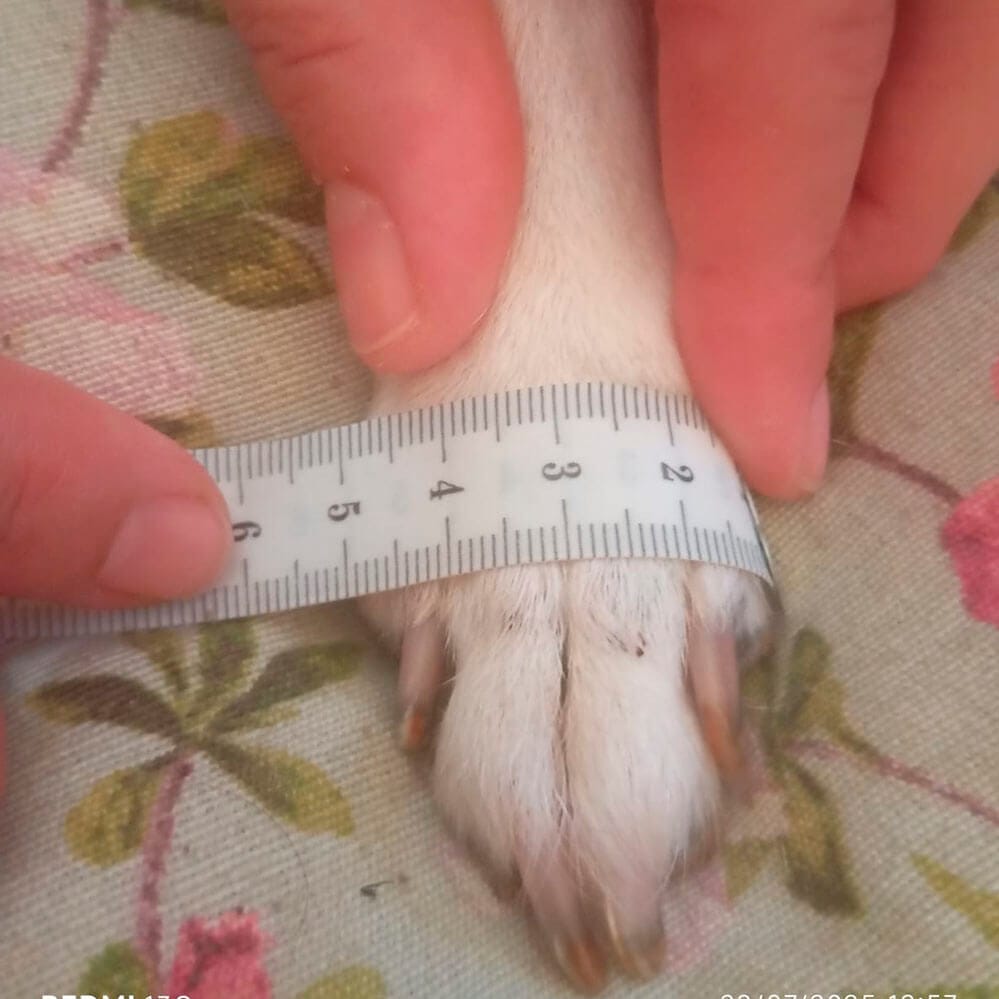
-
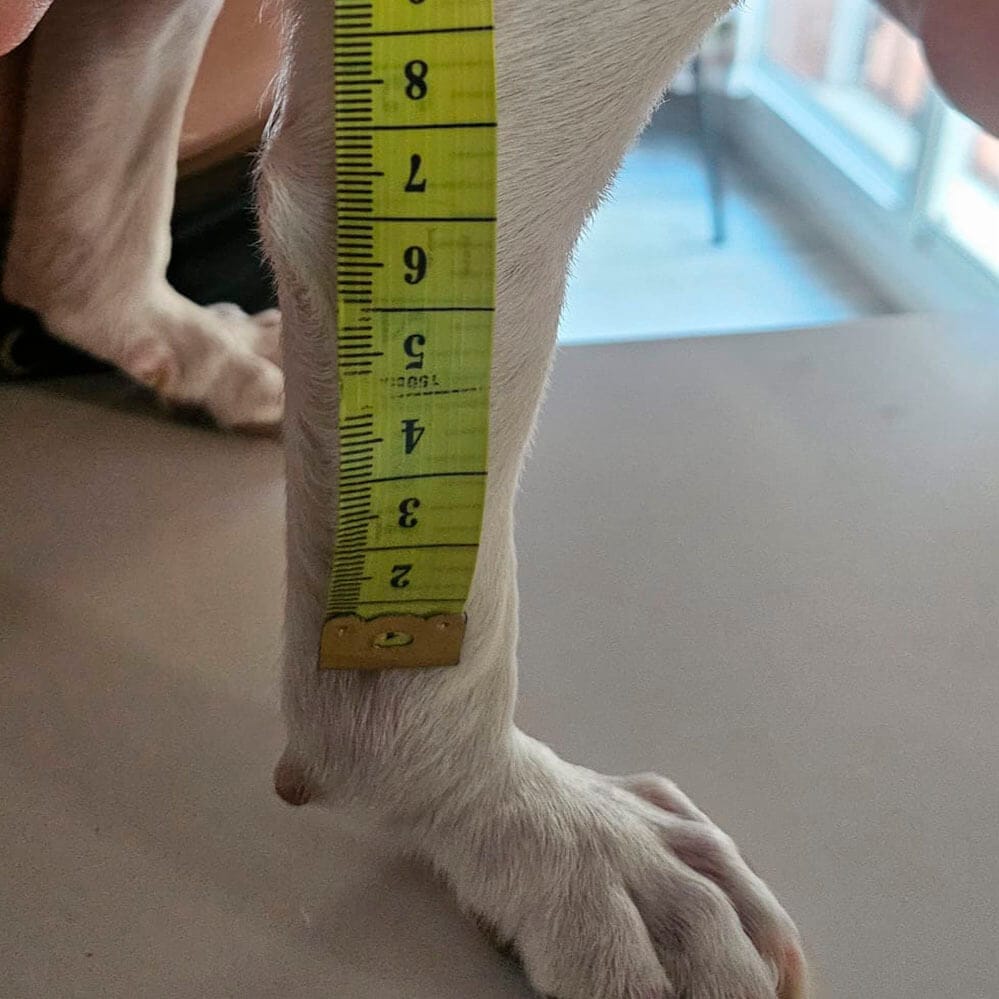
- ❌ The correct point is not marked.
-
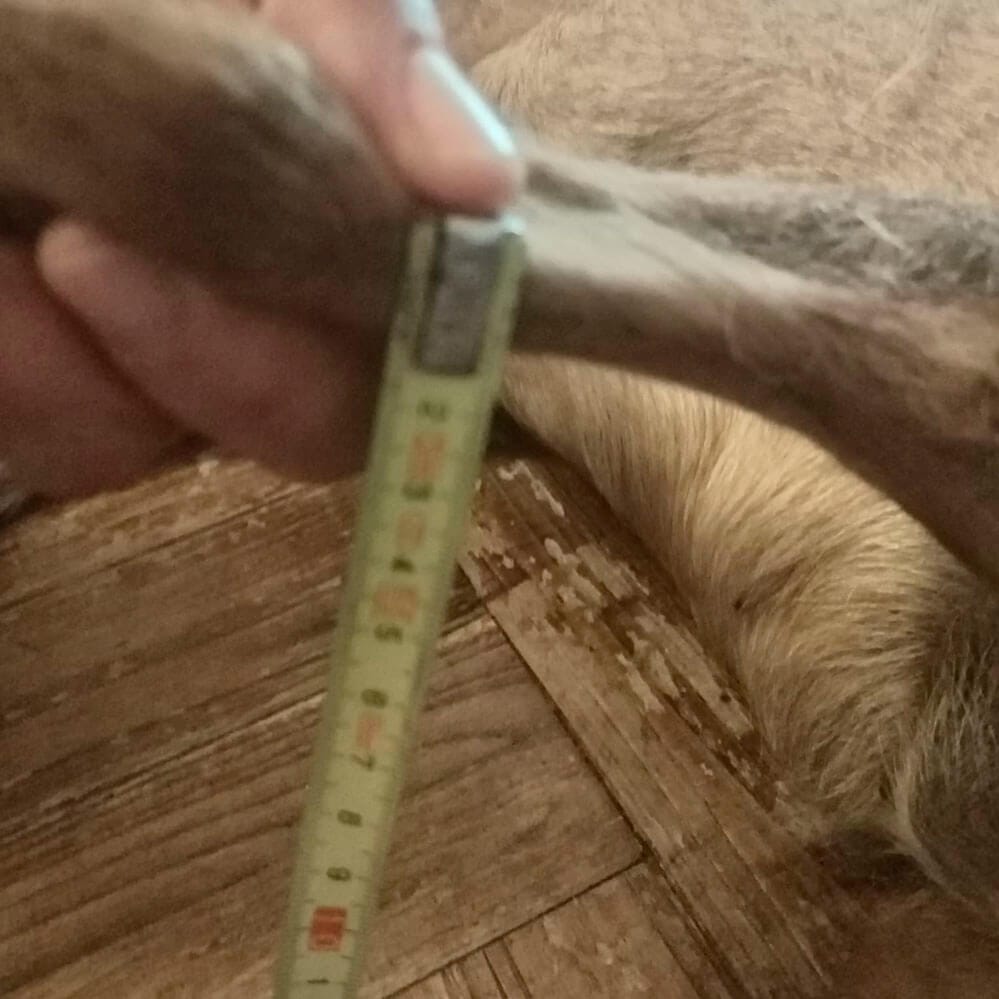
- ❌ Dark, blurry, or out-of-focus photo.
-
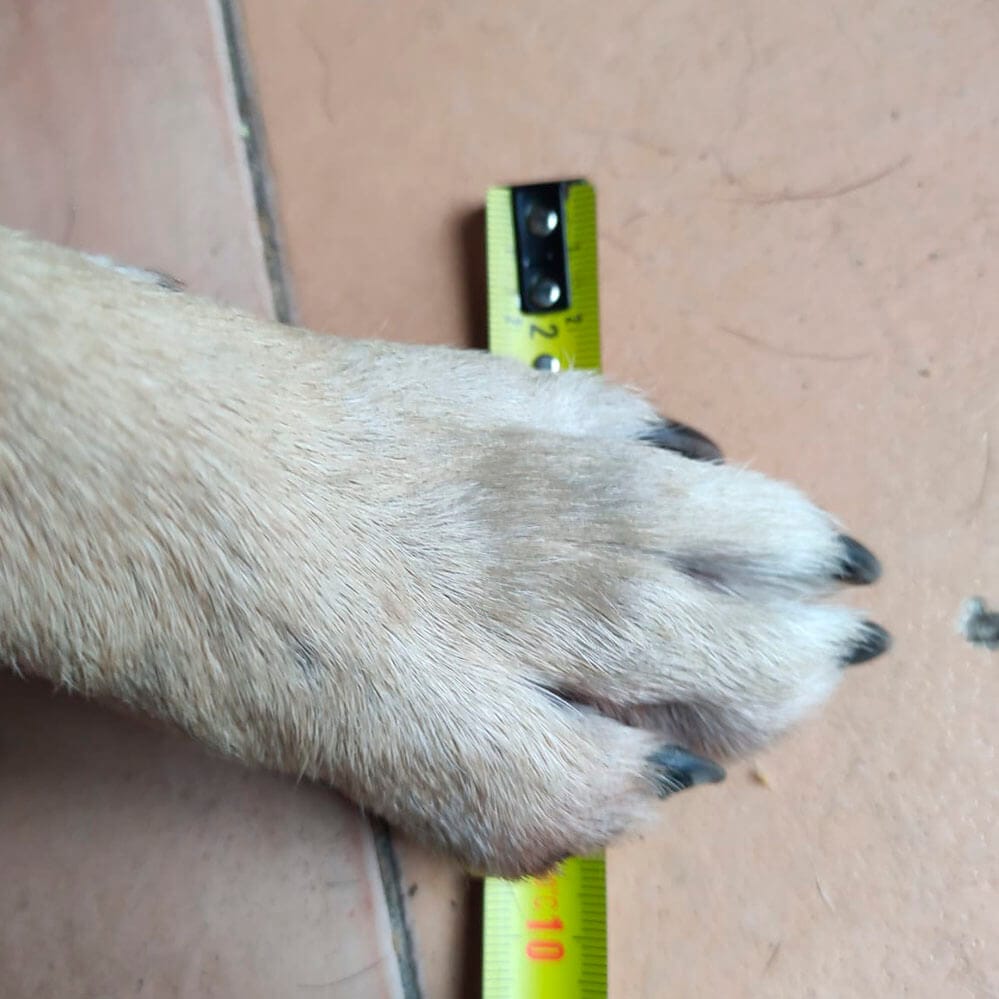
- ❌ Photo not taken head-on.
-

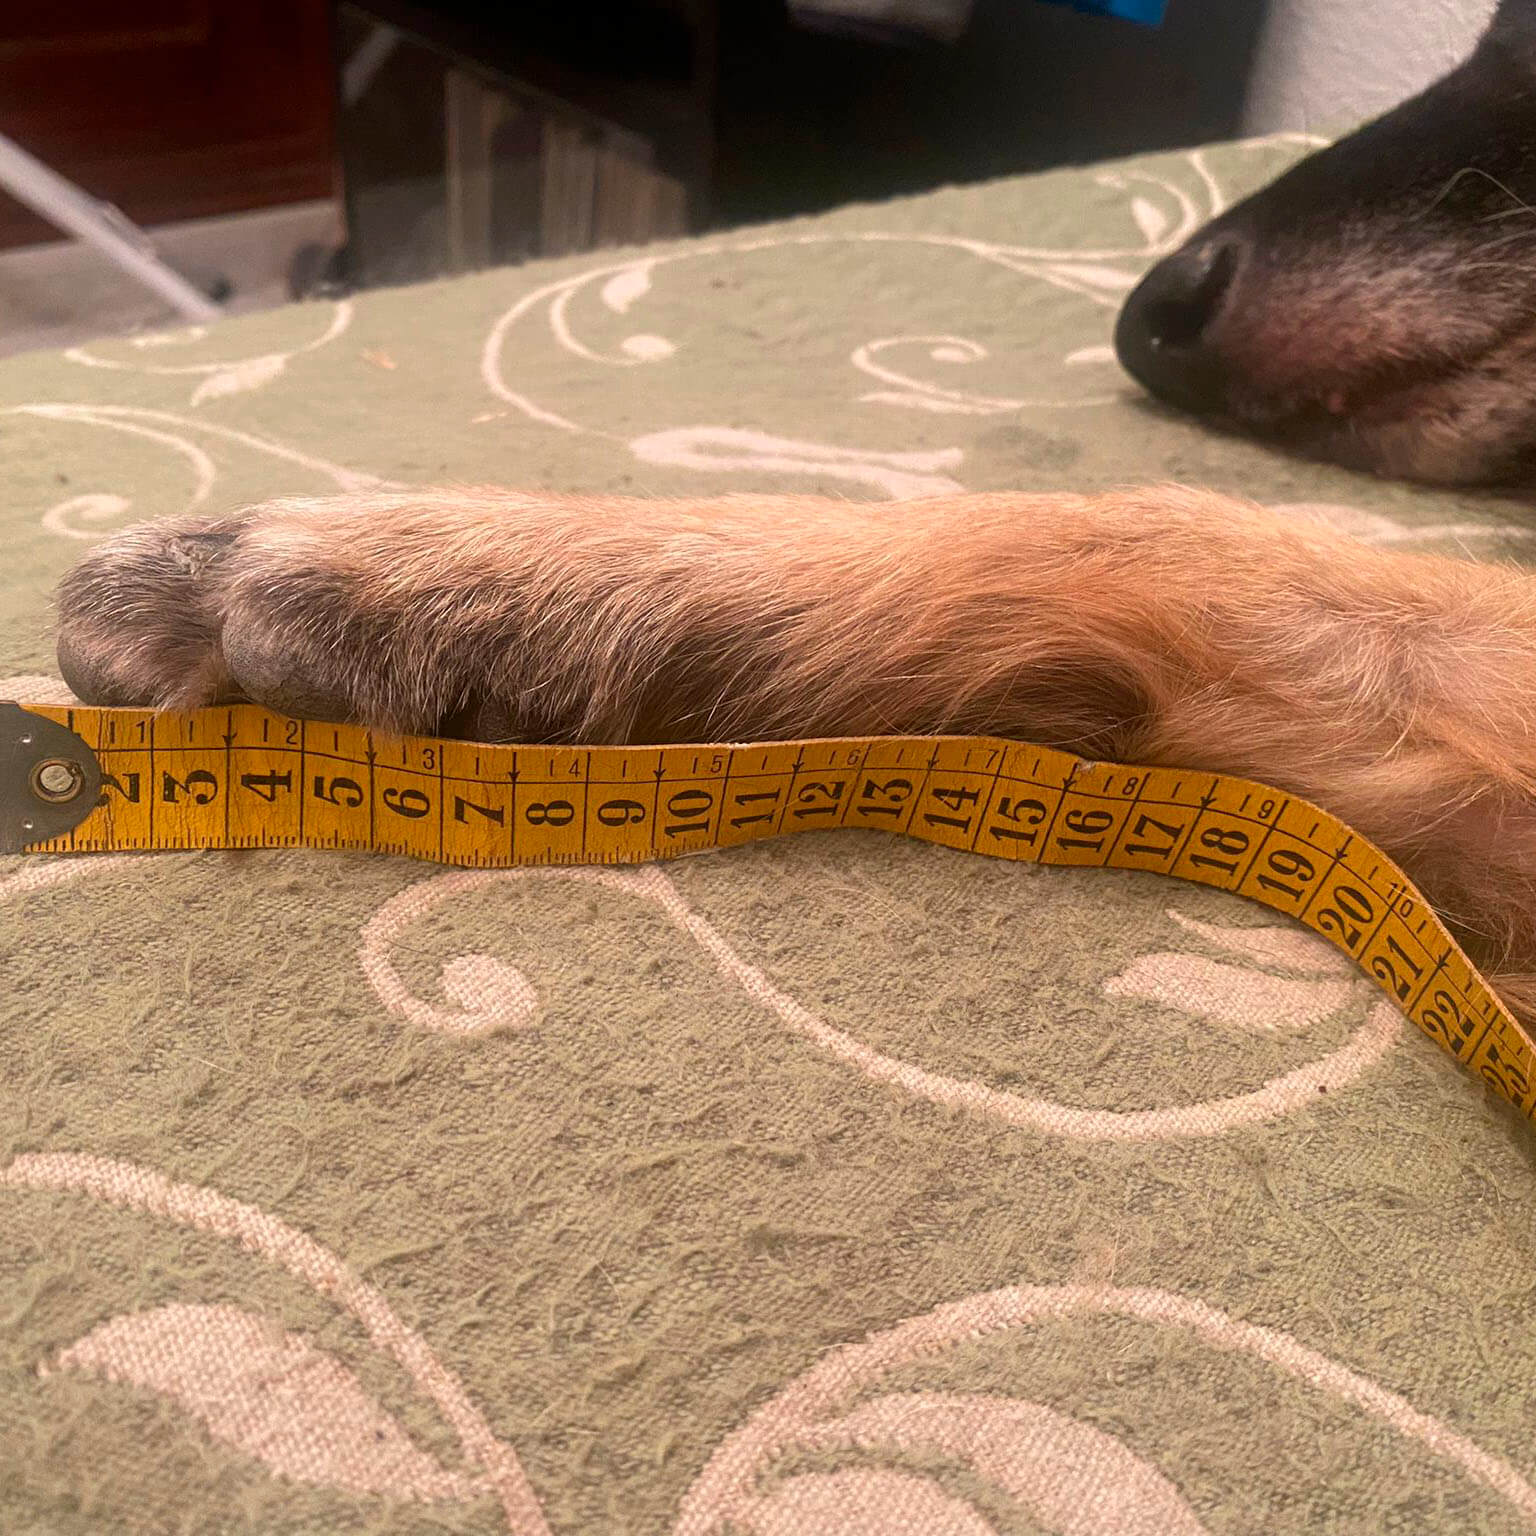
- ❌ The dog is lying down.
-

- ❌ The perimeter is being measured.
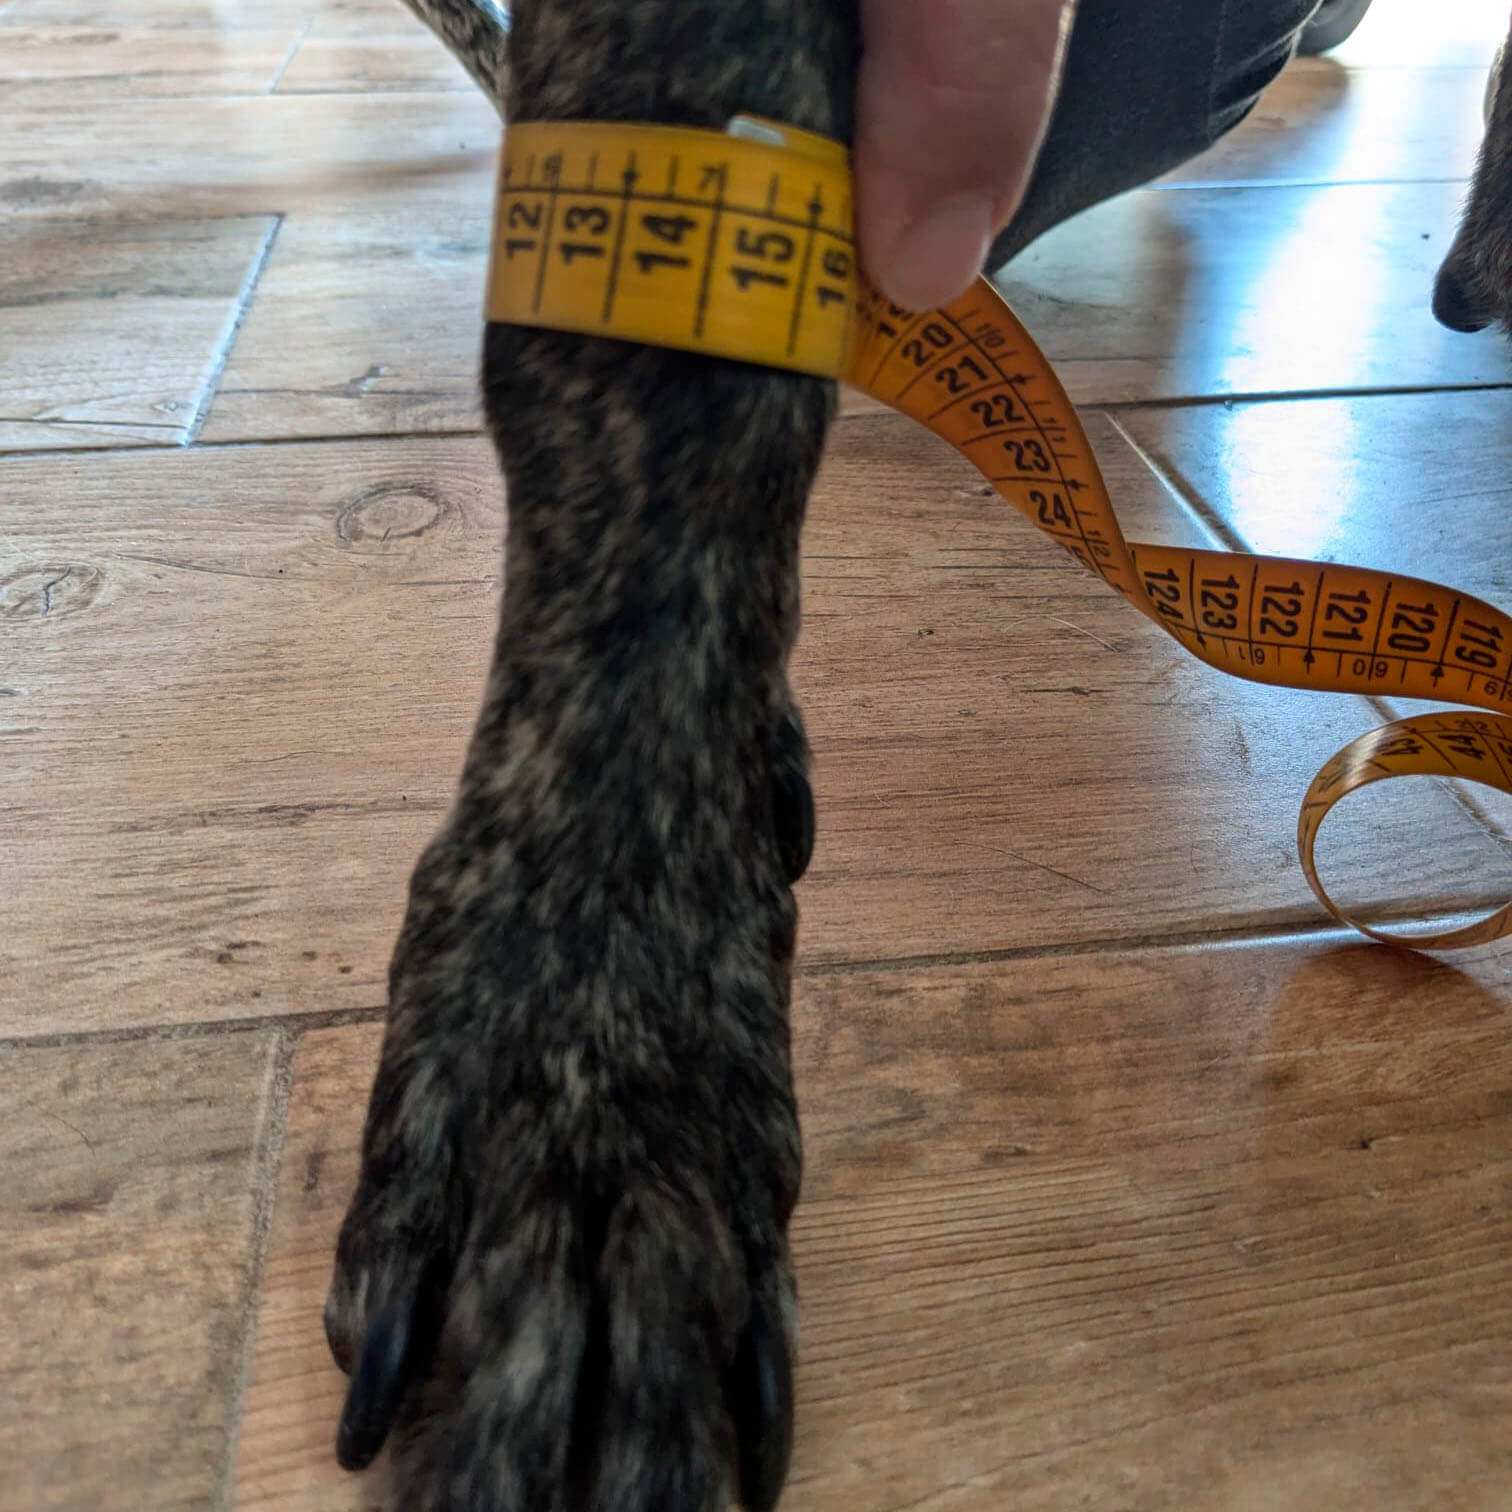
-

- ❌ Hair makes it difficult to read the measurement
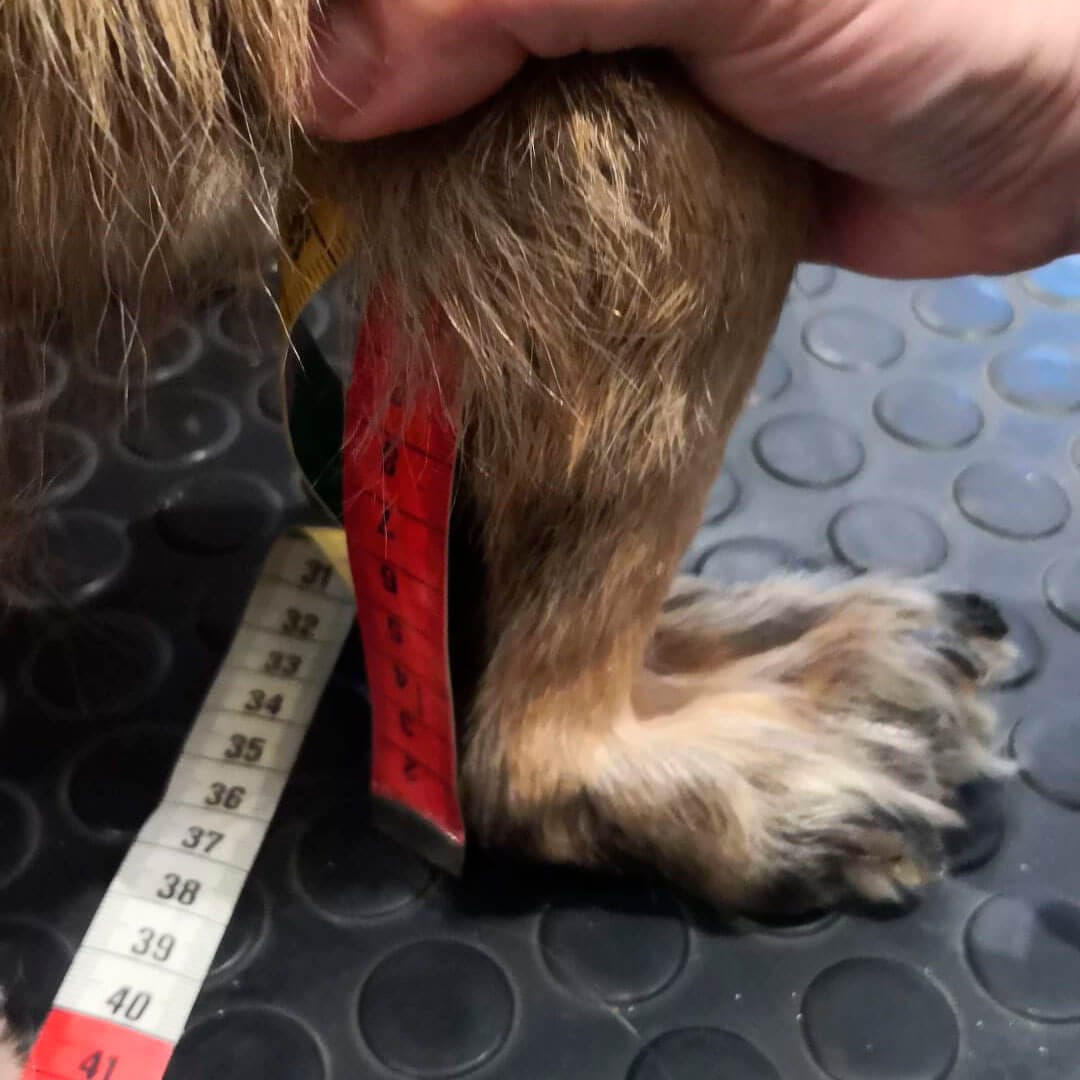
-

- ❌ Measure the width along the side.
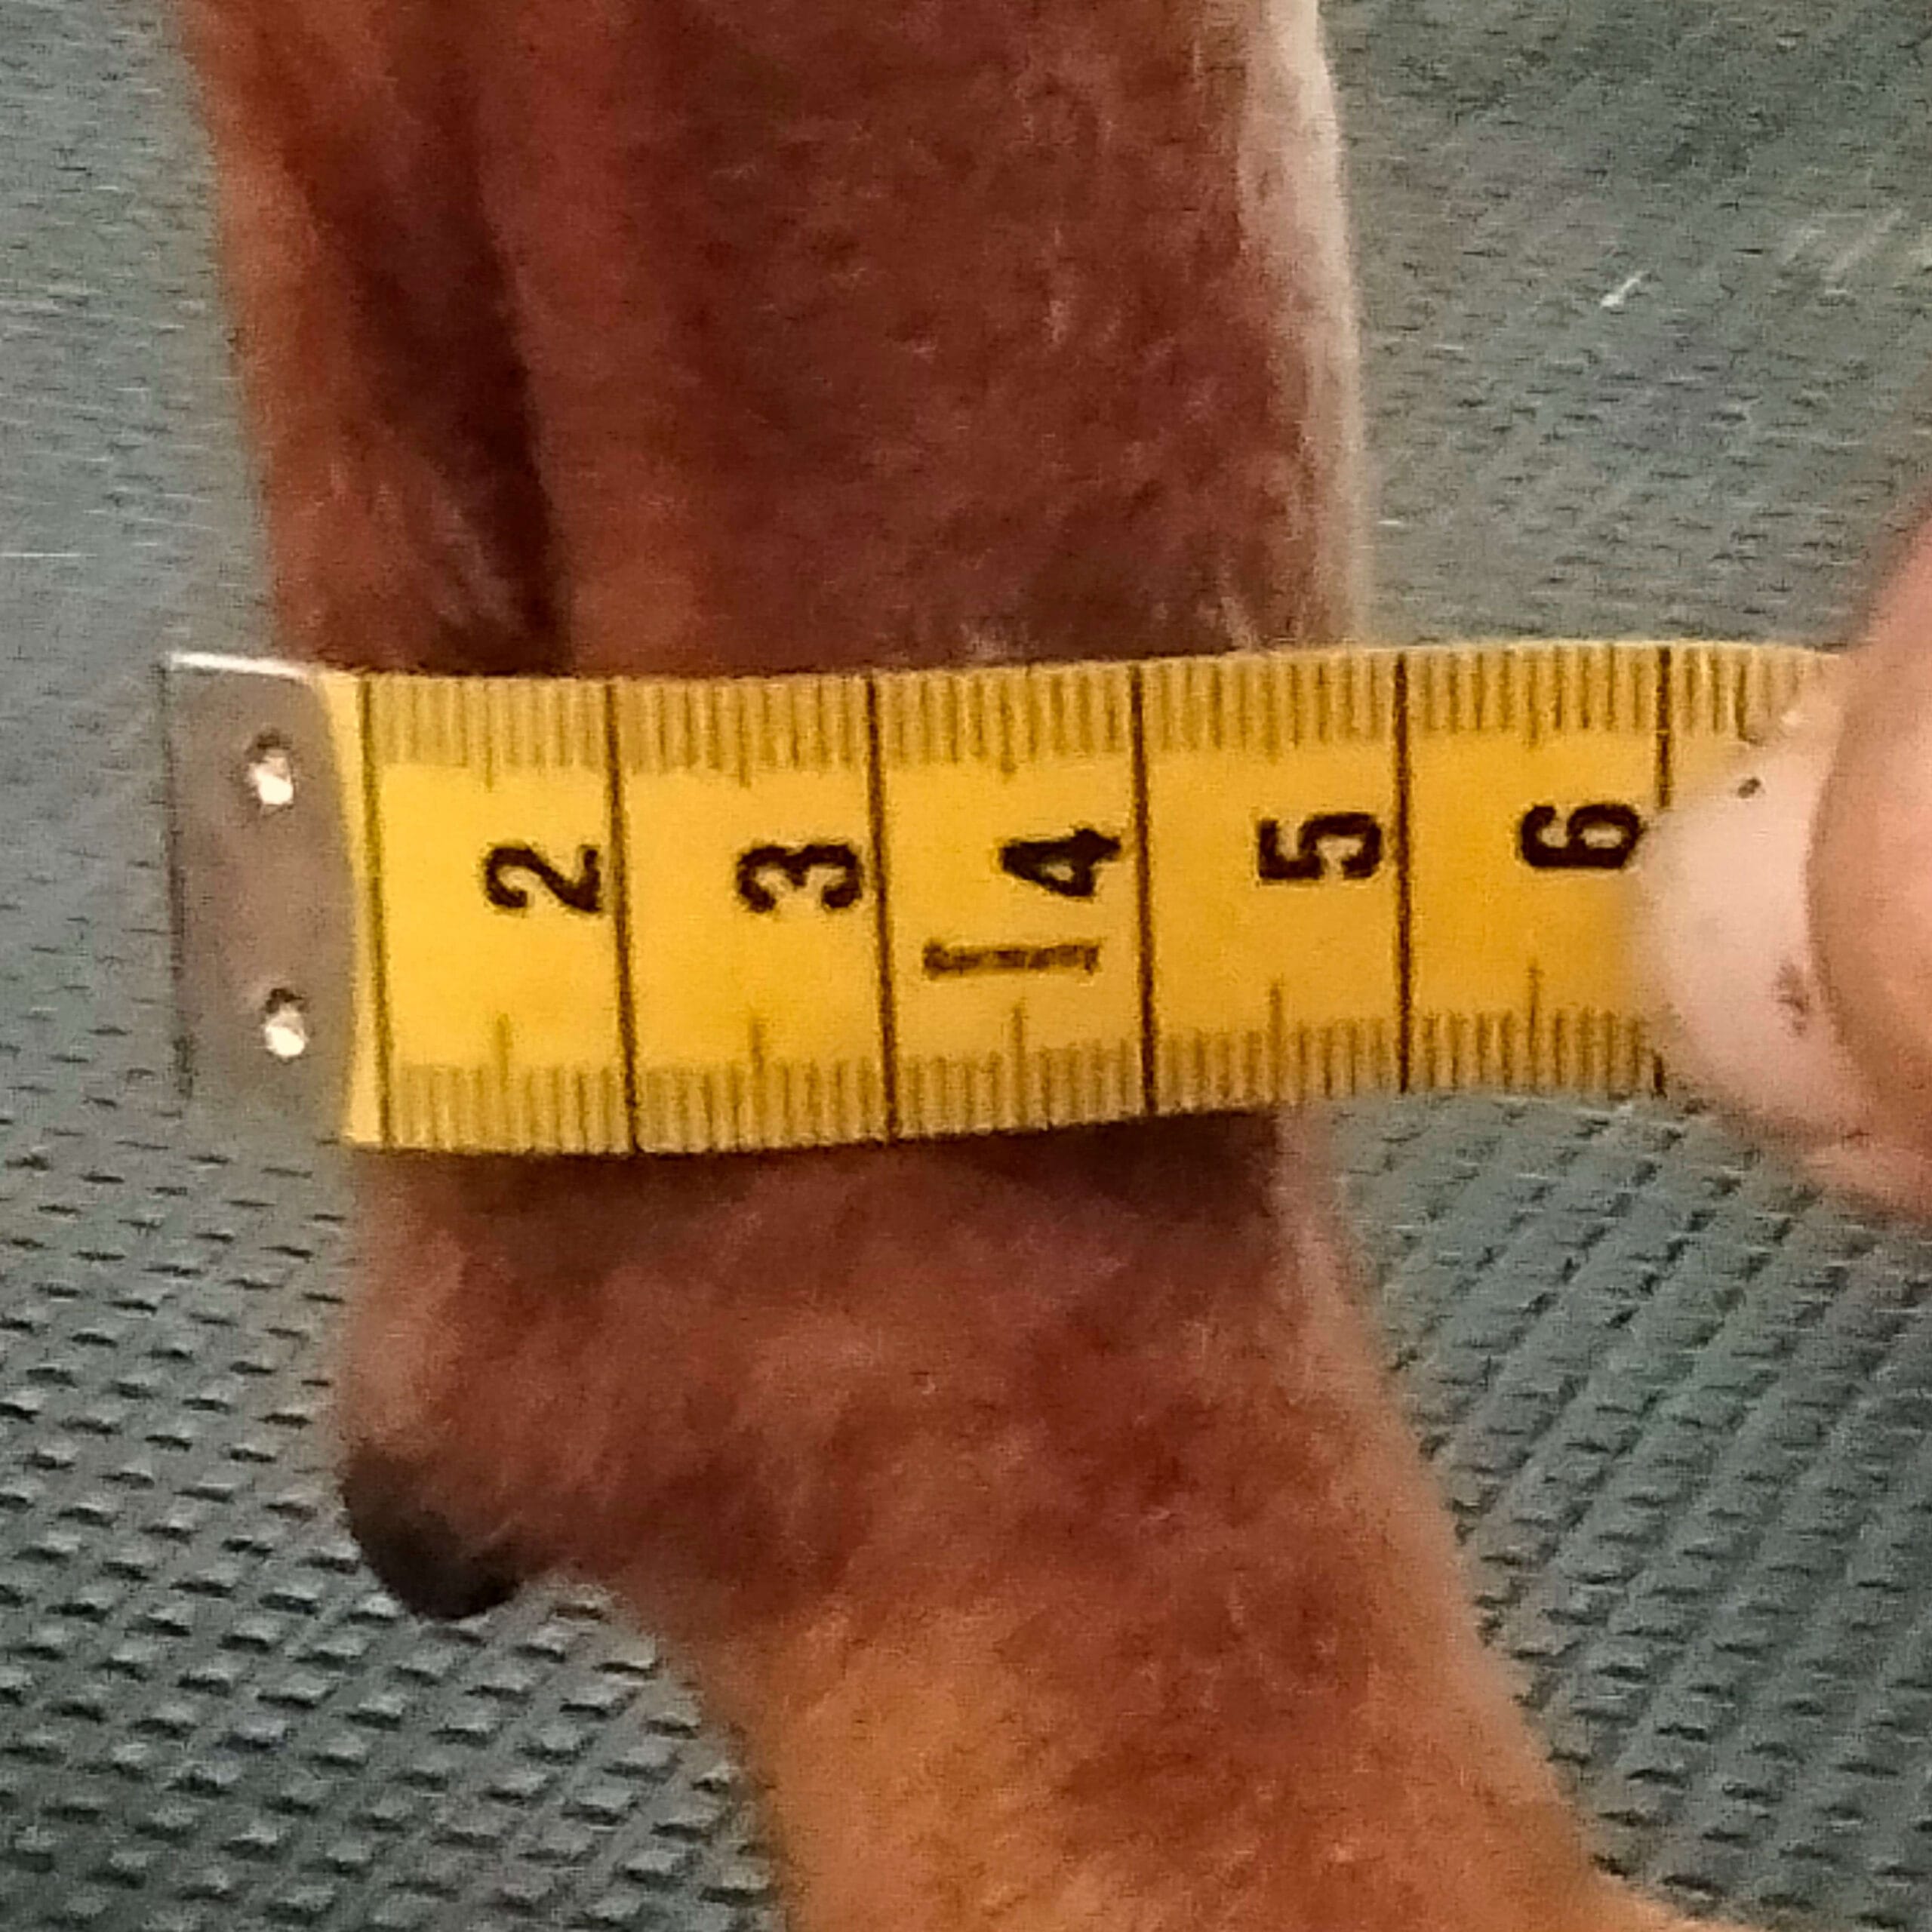
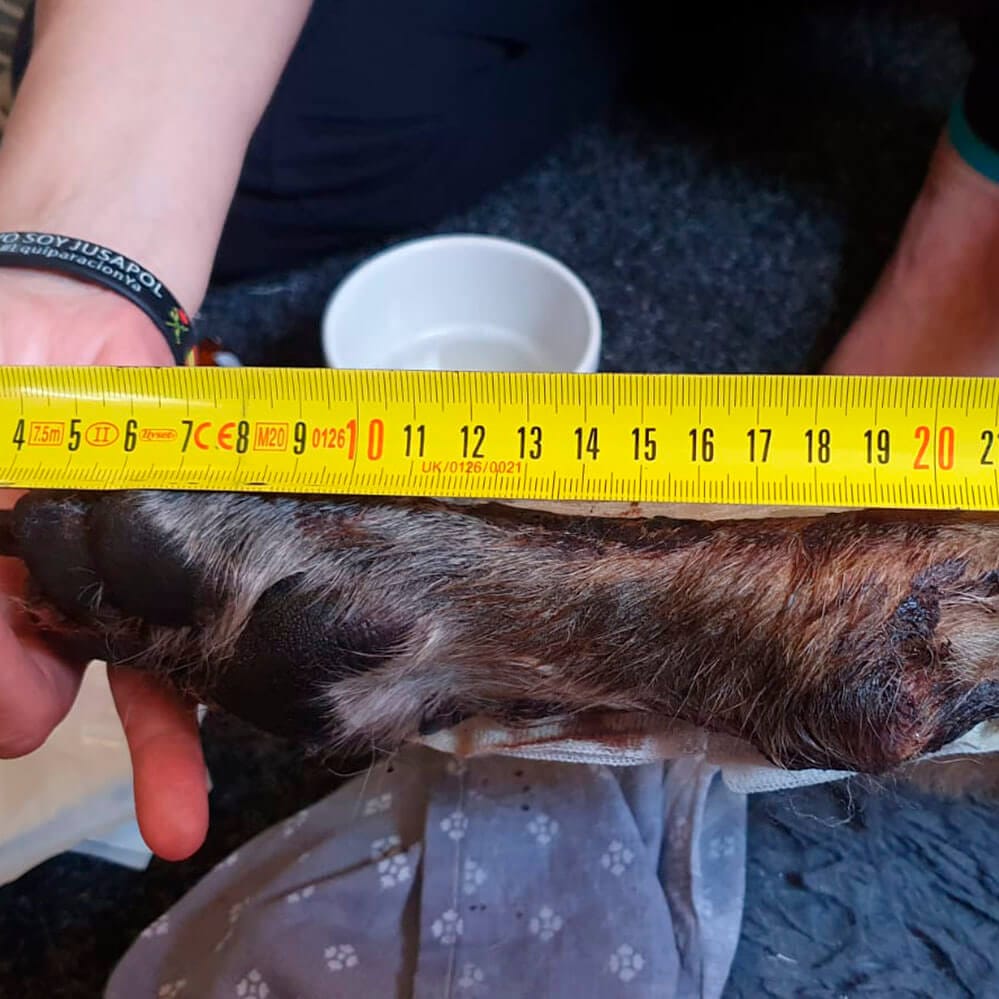
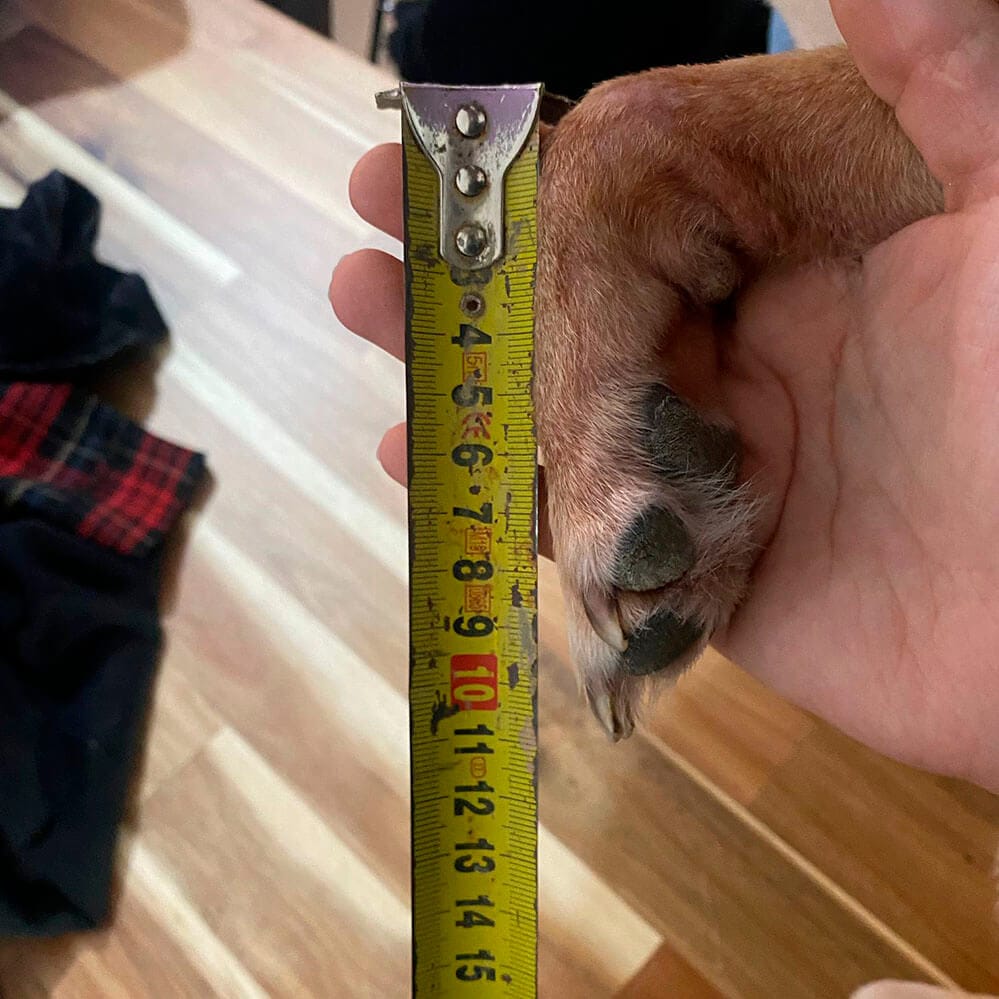
❌ Measurement taken at the front of the limb.
How to measure correctly according to the type of ferrule
Knowing how to measure a dog splint correctly reduces errors and avoids unnecessary returns.
🐾 Front splint for dogs
It is used when there is instability or need for forelimb support.
Basic steps:
Place the dog in a standing position.
Identifies the carpus (wrist). It is common to confuse carpus with elbow. The carpus corresponds to the wrist joint in the dog (see anatomical definition here).
Measure:
The width of the footprint.
The height from the floor to the carpal pad.
The leg should be in a neutral and supported position.
⚠️ Do not measure with the leg bent.
-

-
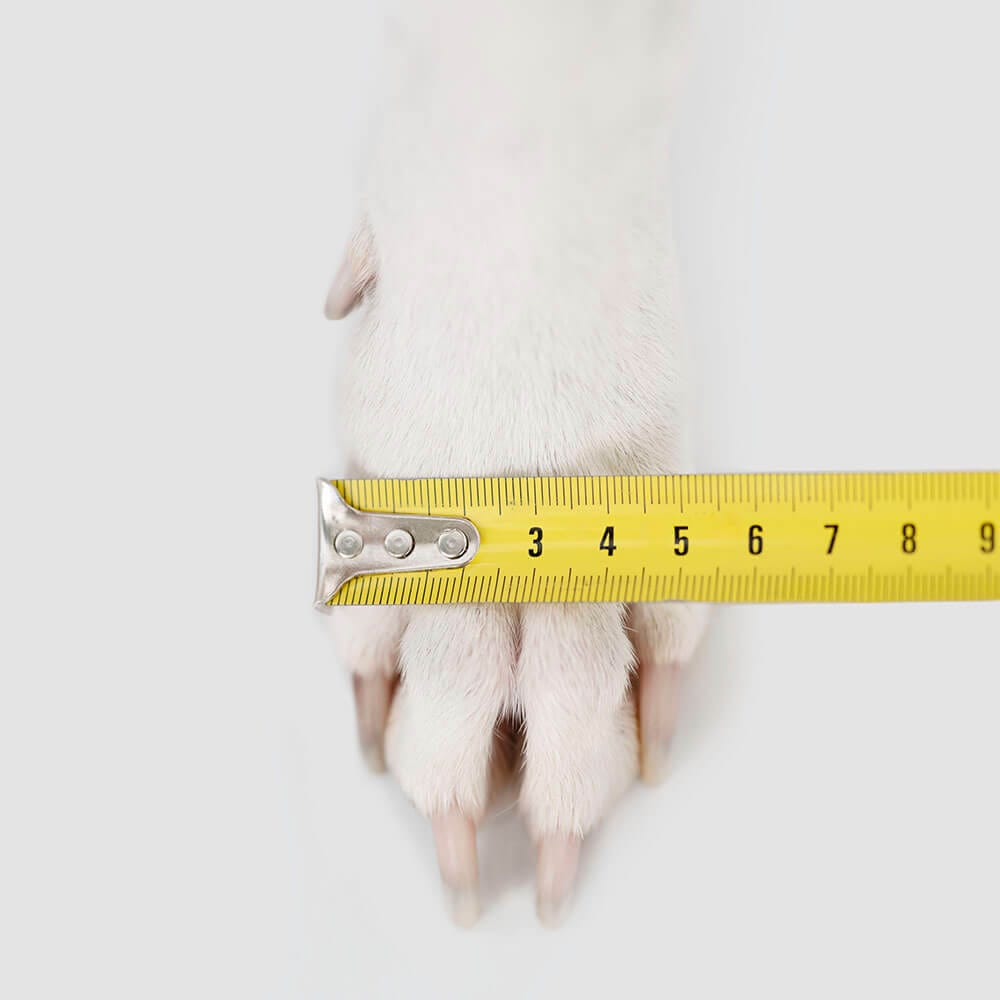
Footprint width
Place the leg firmly on the floor and measure the width at its widest part. If the result is one decimal place, select the larger size.
-
- Measurement B: heightWith the paw firmly on the ground, measure from the ground to the protrusion of the carpus—the “bump” you see on the back of the paw, halfway up.

🐾 Rear splint for dogs
Indicated when there is weakness or instability in the posterior part.
Basic steps:
Standing dog.
Identify the tarsus (or hock). It is common to confuse the tarsus with the knee. The tarsus corresponds to the hock joint in the dog’s hind limb, located between the tibia and the metatarsals (see anatomical definition here).
Measure:
The width of the footprint.
Length from the palmar pad (on the ground) to the tarsus (hock).
Do not measure with the leg backward or flexed.
⚠️ The tarsus should be in a natural position, not in hyperextension.
-
-
Footprint width
Place the leg firmly on the floor and measure the width at its widest part. If the result is one decimal place, select the larger size.
-
- Tarsus heightWith the foot firmly planted on the ground, measure from the ground to the edge of the tarsus, without going beyond it.

🐾 Carpus splint
More specific for wrist support.
They are measured:
Width at the widest part of the carpus (wrist).
Desired height from the carpus to the elbow without impeding the movement of the elbow.
It is important not to confuse carpus with elbow (see anatomical definition here).
-
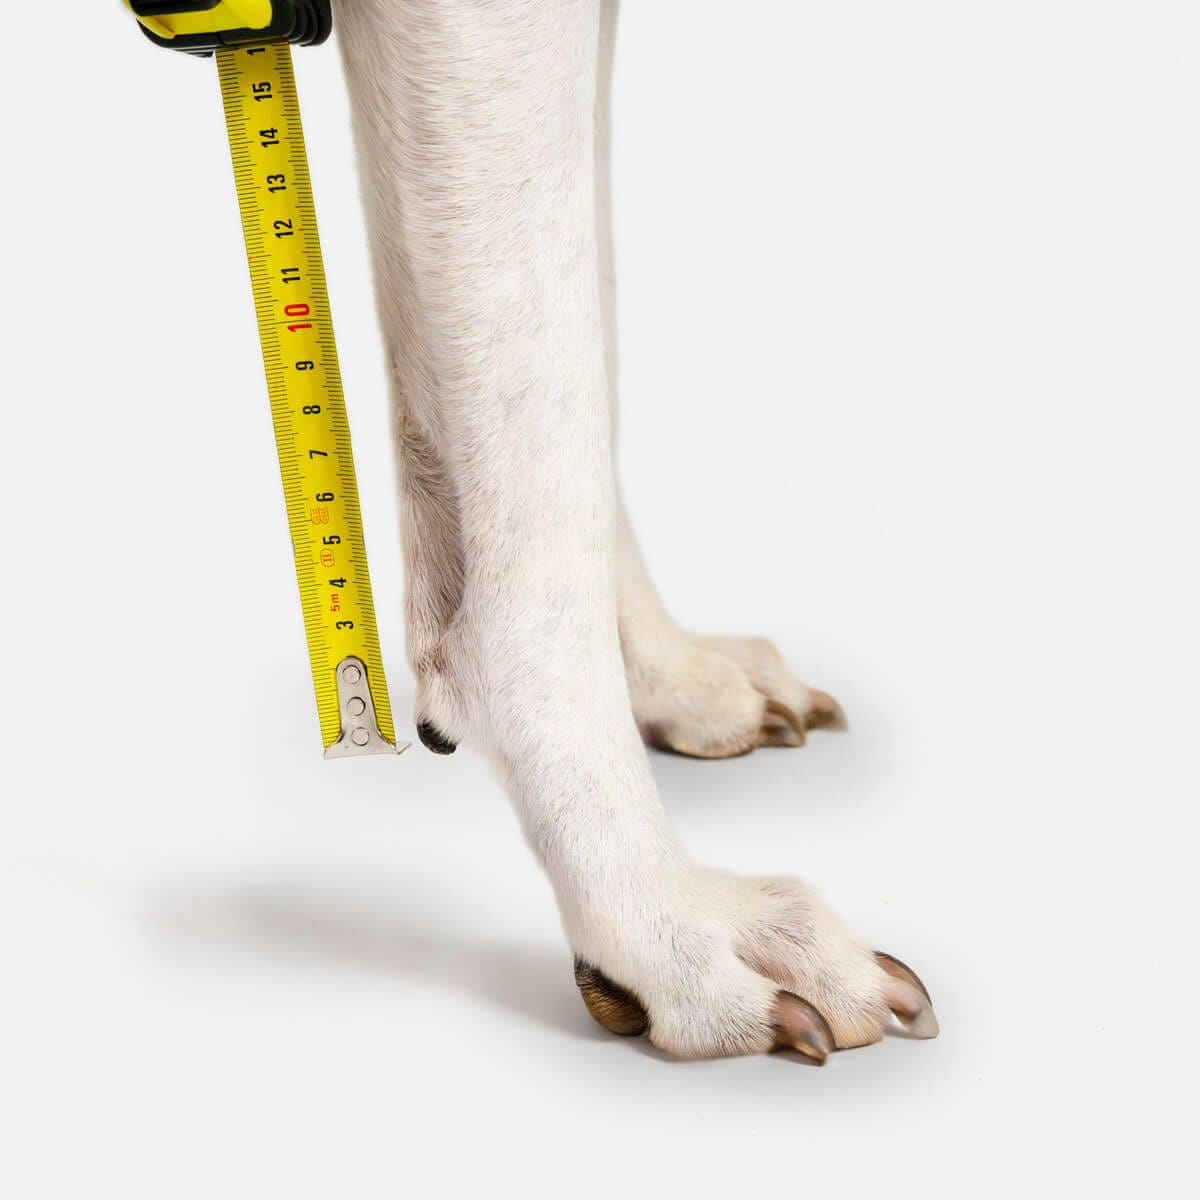
- Measure from the bottom of the wrist to the floor with the dog standing on its feet.
-
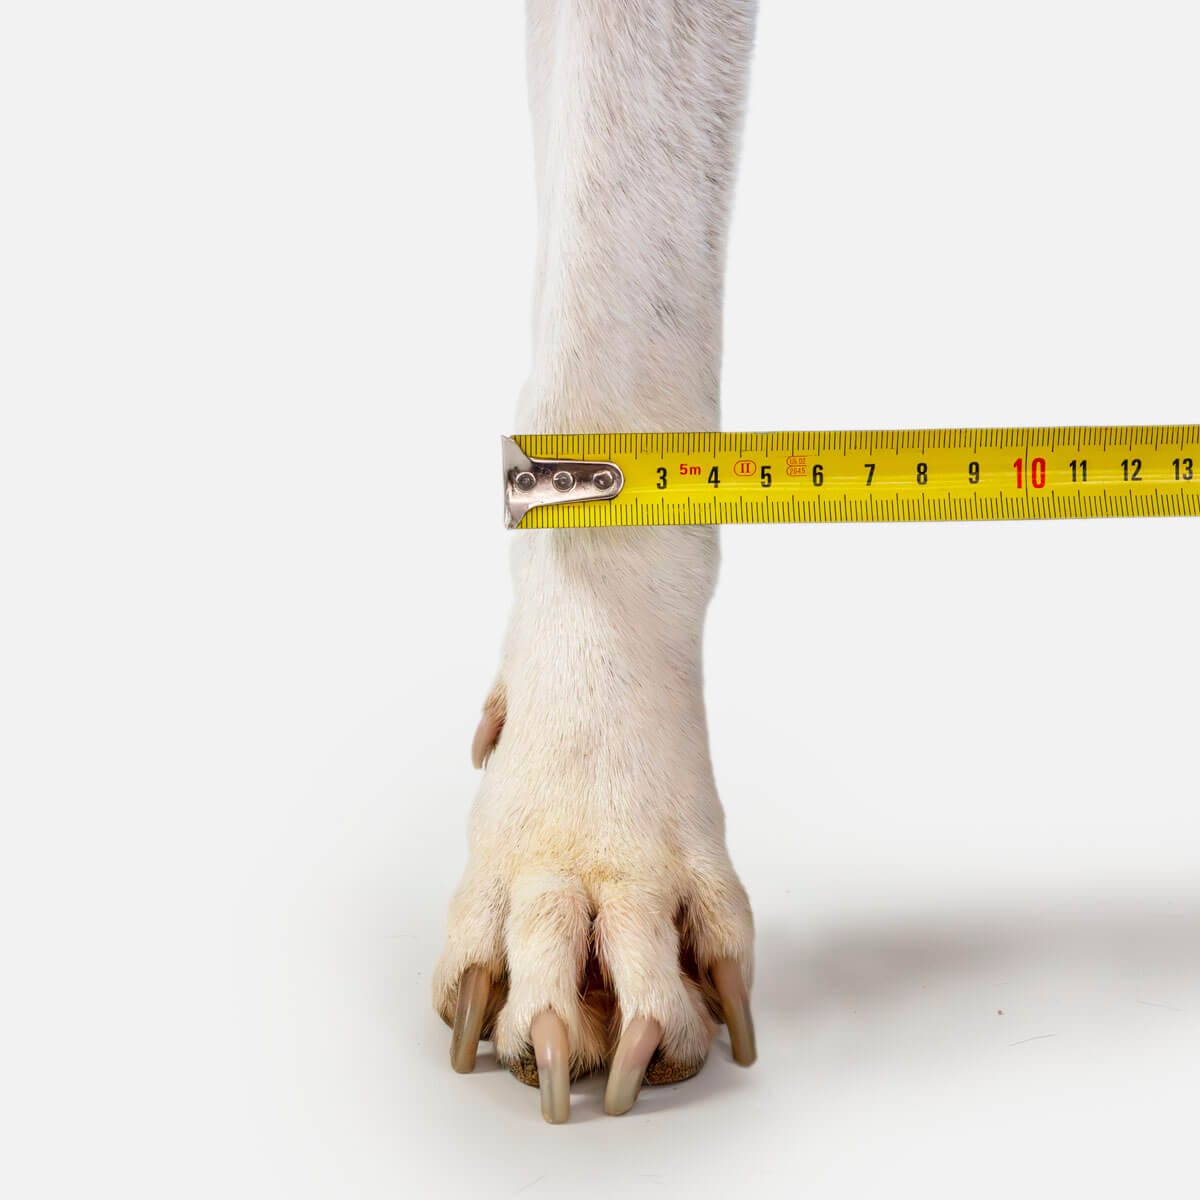
- Be sure to measure with the dog standing and its paw fully on the ground.
-
- Measure the width of the leg at its widest point for a precise fit.
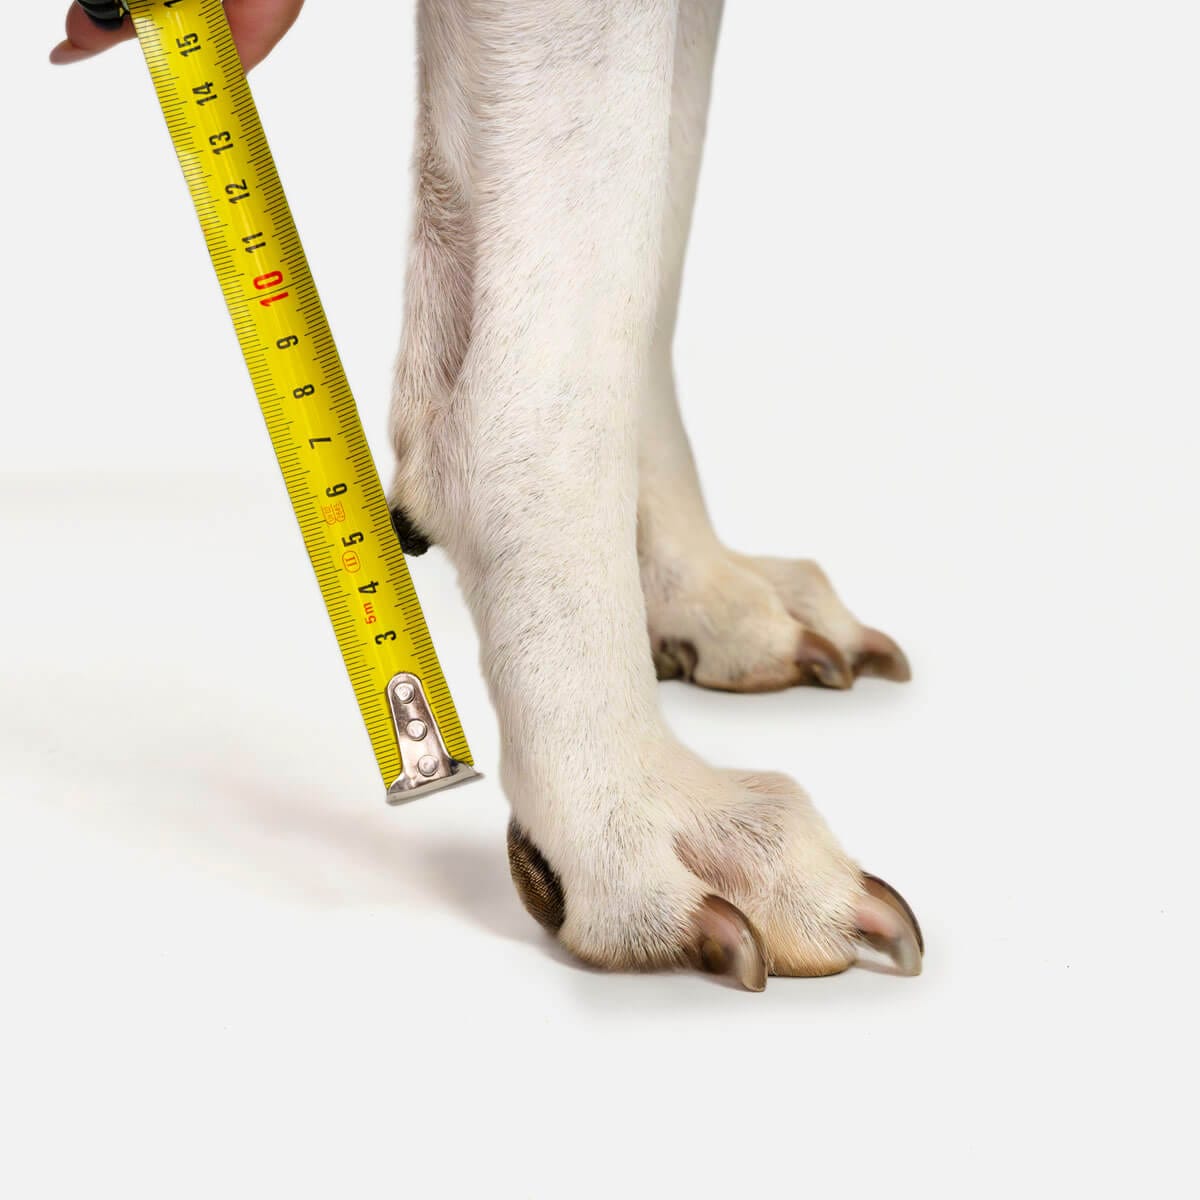
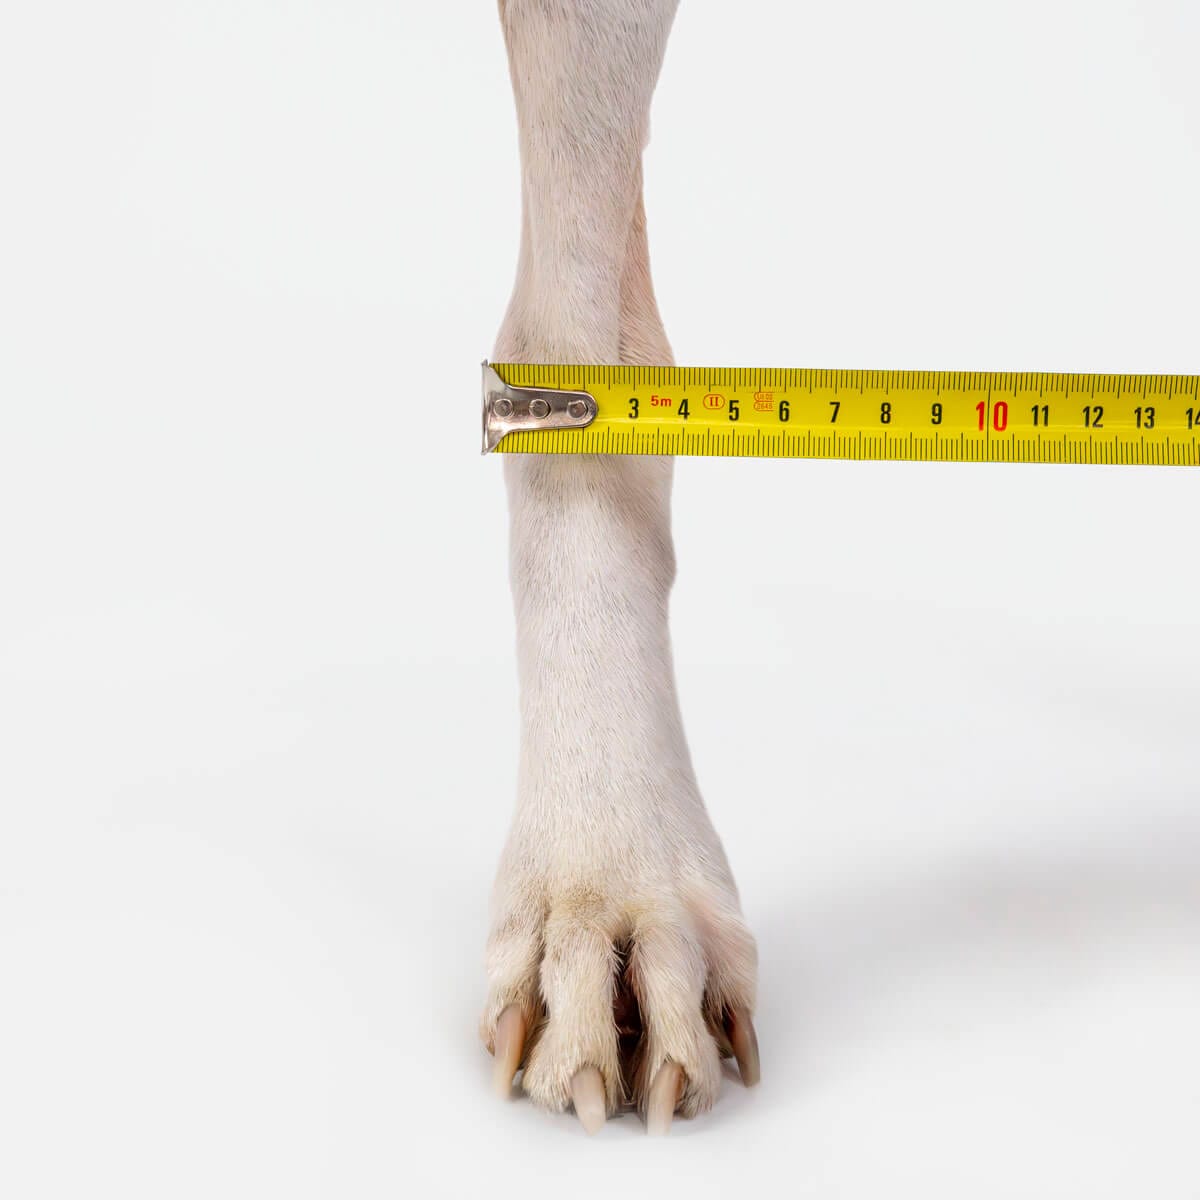
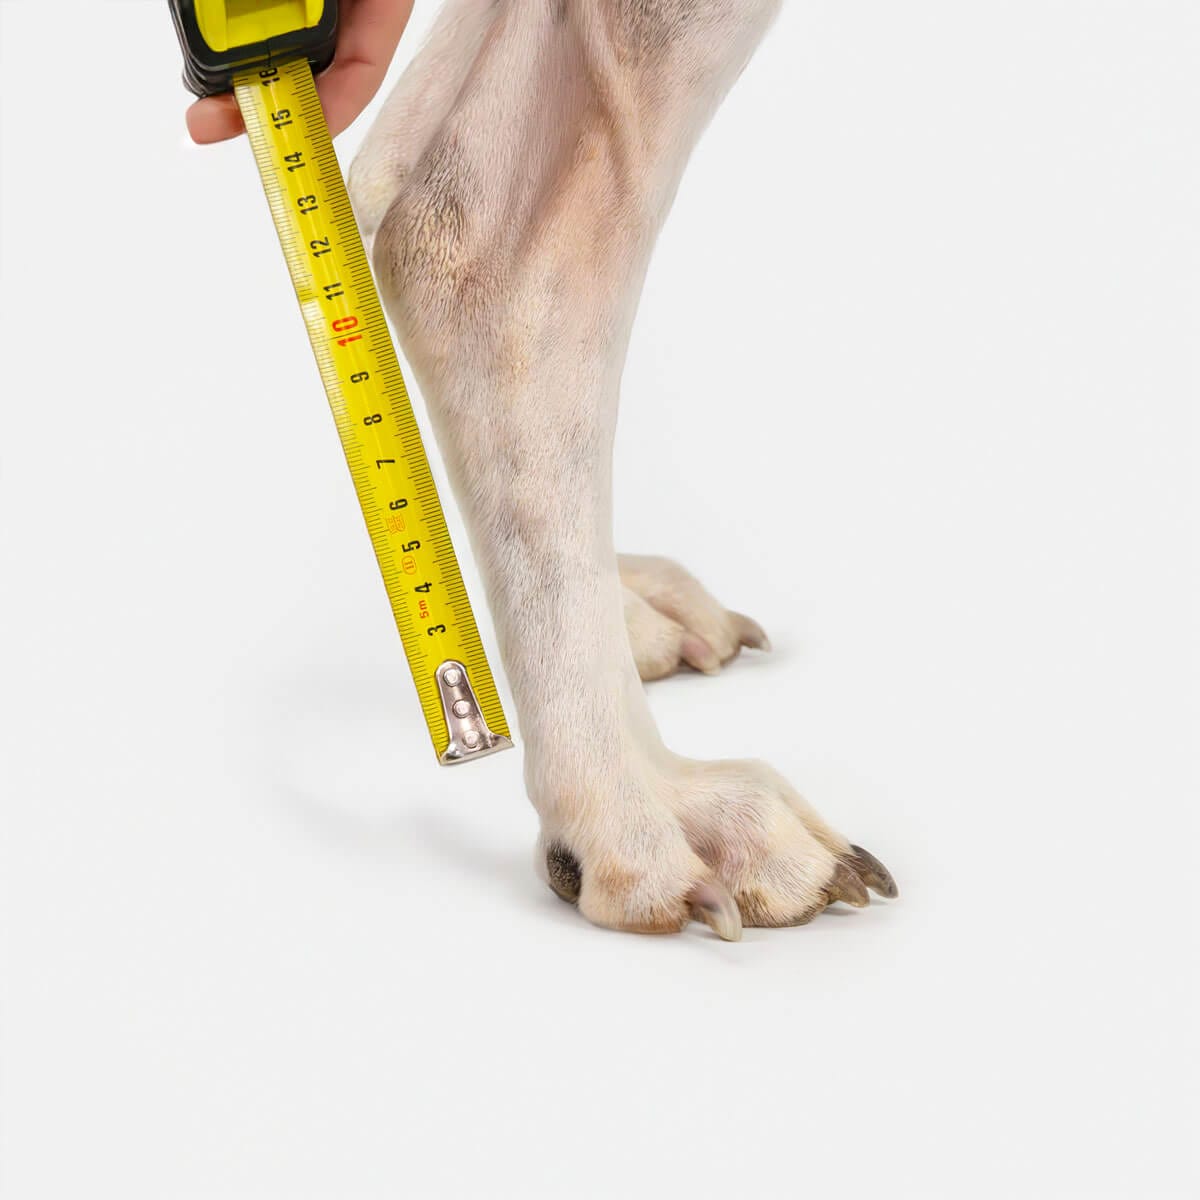
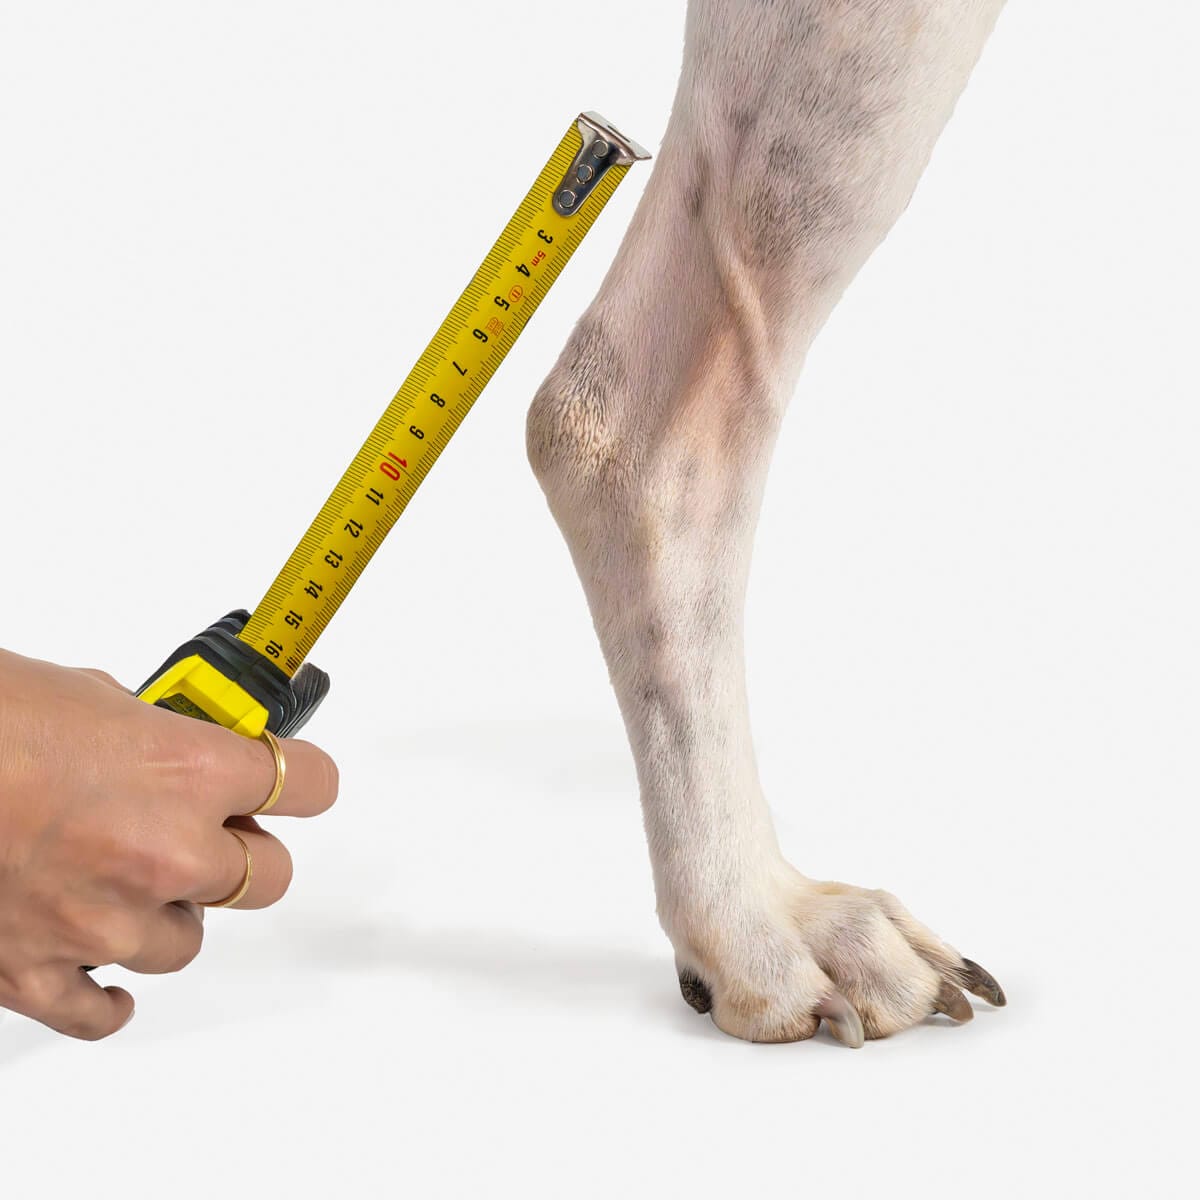
🐾 Tarsal splint
Indicated for localized support in the hock.
They are measured:
Width of the tarsus at the widest part.
Height from the toes to the tarsus. The splint should not reach the floor, nor impede the articulation of the toes when walking.
It is common to confuse the knee with the tarsus. The knee is much higher (see anatomical definition here).
-
- Measure the width of the tarsus with a rigid or flexible measuring tape, without compressing the fur.
-
- Measure from the tarsus downward without restricting the flexion of the hoof joint.
-
- Measure from the hock to the midpoint between the tarsus and the knee, with the dog standing on its feet.
Signs that a measurement is invalid
Detecting these faults early is part of knowing how to correctly and professionally measure for a dog splint.
Photos without a clear view of the tape measure.
Twisted tape measure.
Raised leg.
Dog in motion.
If any of these situations occur, it is best to repeat.
What to do if you have doubts
If you are still unclear about how to measure for a dog splint, it is best to repeat the process calmly before confirming the order.
If something doesn’t fit:
Re-measure.
- Contact and send photos.
We accompany you step by step.
Our goal is to make it look as good as possible.
Professional advice based on actual experience
Always measure twice.
If the dog has a lot of hair, compress lightly.
Ask another person for help if the dog moves.
Take the photos for review always at the height of the leg, not from above.
Don’t be in a hurry.
A well done measurement reduces incidences and improves the final fit.
Frequently asked questions on how to measure for a splint in dogs
What happens if I get a measurement wrong?
If you have measured correctly, following this guide in detail, your measurements are most likely correct. Our sizing covers 88% of normal cases so you should be covered. But if not, contact us and we will arrange a solution.
Can I measure with the dog lying down?
It is not recommended. It should be in natural support. If you are unable to support (because you are in pain, you move around a lot, you cannot put the limb in normal support position, etc), check our article -> When to choose a custom fit splint and when a custom fit splint? to find out if a custom fit option is better for your case.
Do I need to send photos?
It is not a requirement. Our splints have a technical sizing that would cover your measurement, but to have 100% peace of mind you can always send the photos so we can see how they are.
What do I do if my dog won’t let me measure?
Ask for help or take short breaks. Never force. Again, if you cannot measure well because there are problems such as limb locked at fixed angle or limited movement, there is pain from wounds or ulcers, etc. Check the answer to Can I measure with the dog lying down?
Does the splint replace veterinary treatment?
The function of the splint is to assist in carrying out veterinary treatment. It is not a method that replaces it. It is an orthopedic support that helps to stabilize, support and accompany the recovery process. If you have doubts about whether it is the right option, consult your trusted specialist. You can also review these articles:
– Technical size splint or customized splint: which one is better for your dog?
– Carpal hyperextension in dogs: causes, symptoms and treatment
What if I don’t know how to measure for a splint in dogs?
In Mihapi we have at your disposal an online or in-person appointment service to guide you in taking measurements if you consider it necessary. Find out more here.
In conclusion
Learning how to take measurements for a dog brace step by step is key to a perfect fit. Taking measurements may seem complicated at first, but with calmness and following this guide, it is entirely possible to do it correctly.
When you know exactly how to take measurements for a dog brace, you reduce errors, avoid unnecessary repetitions and improve the fit of the brace from the very beginning.
And if you have any questions, we’re here to help.